Invoicing
Invoicing turns the work performed (labor and parts) into an invoice sent to the customer.
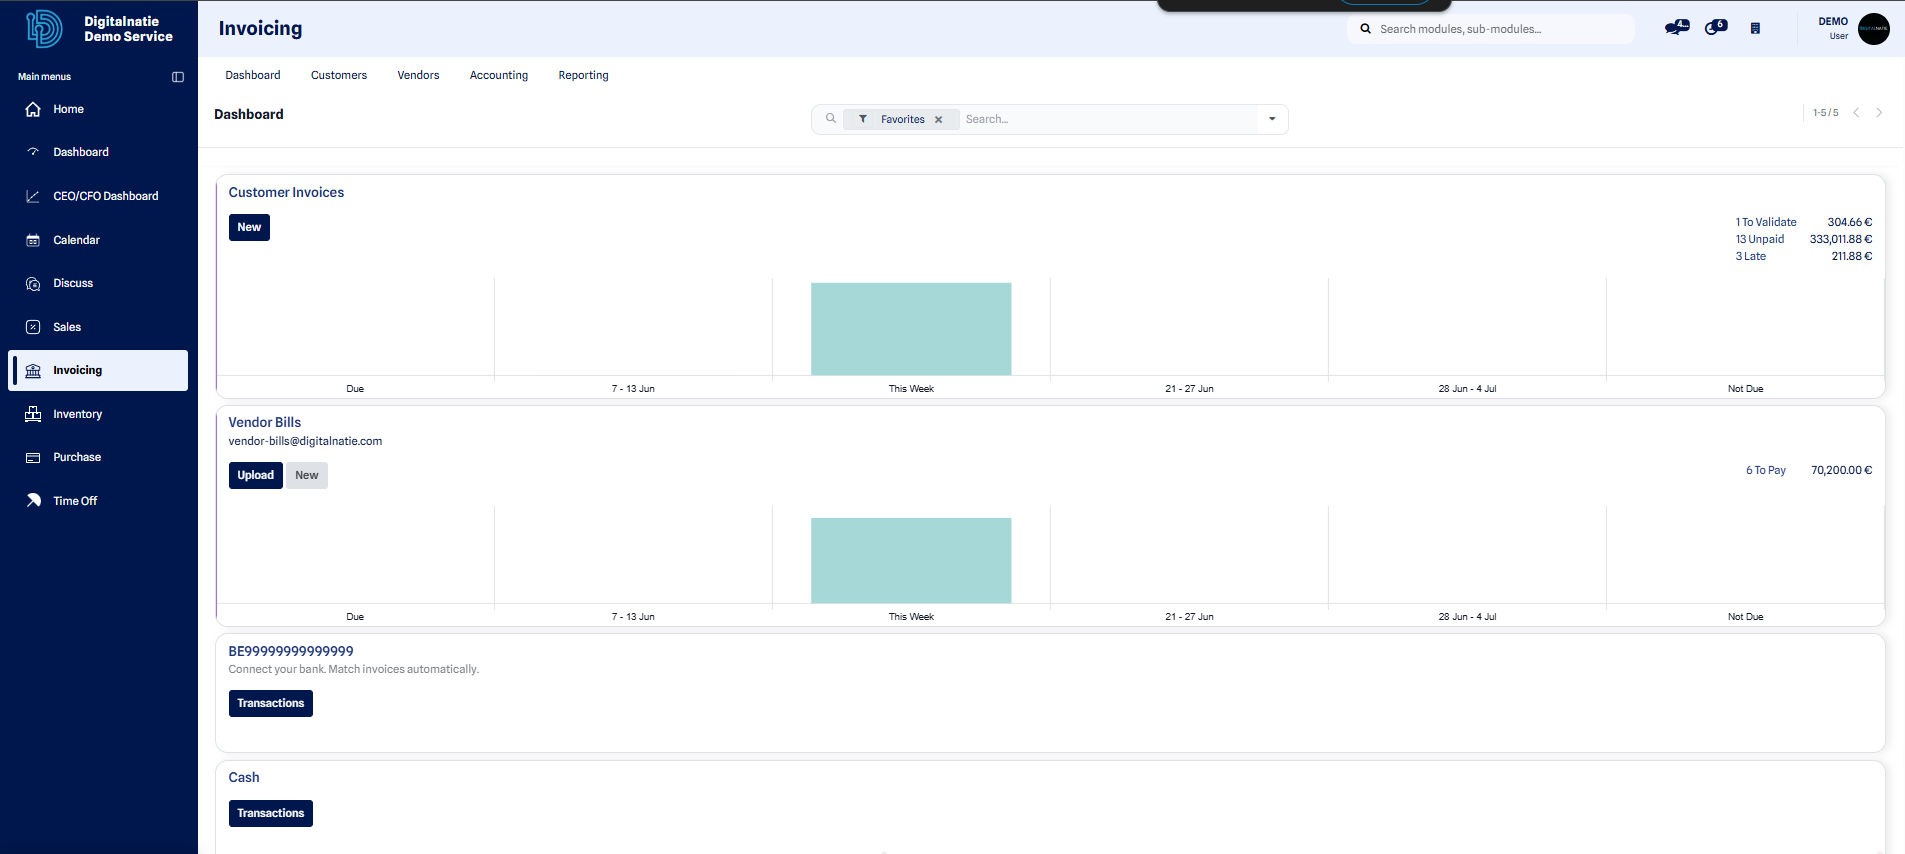 The invoicing dashboard brings together your invoices and their tracking.
When to use it: once the intervention has been carried out and the service order has moved to the Done status, when the report, the hours and the parts are validated and ready to be invoiced.
Invoice from a service order
Section titled “Invoice from a service order”This procedure creates the invoice directly from a completed intervention.
-
Open the relevant Service order, in the Done status.
-
Quickly check the intervention report, the hours logged by the technician and the parts used.
-
Click Create invoice. A Draft invoice is generated from the labor and parts.
-
Review the invoice: lines, quantities, amounts, VAT and the customer’s details.
-
Confirm (post) the invoice to validate it and assign it a final number.
-
Send the invoice to the customer.
Expected result: a Posted invoice, numbered and linked to the service order, ready to be sent and then tracked through to payment.
View and create an invoice
Section titled “View and create an invoice”You can also find all your invoices and create one manually, without going through a service order.
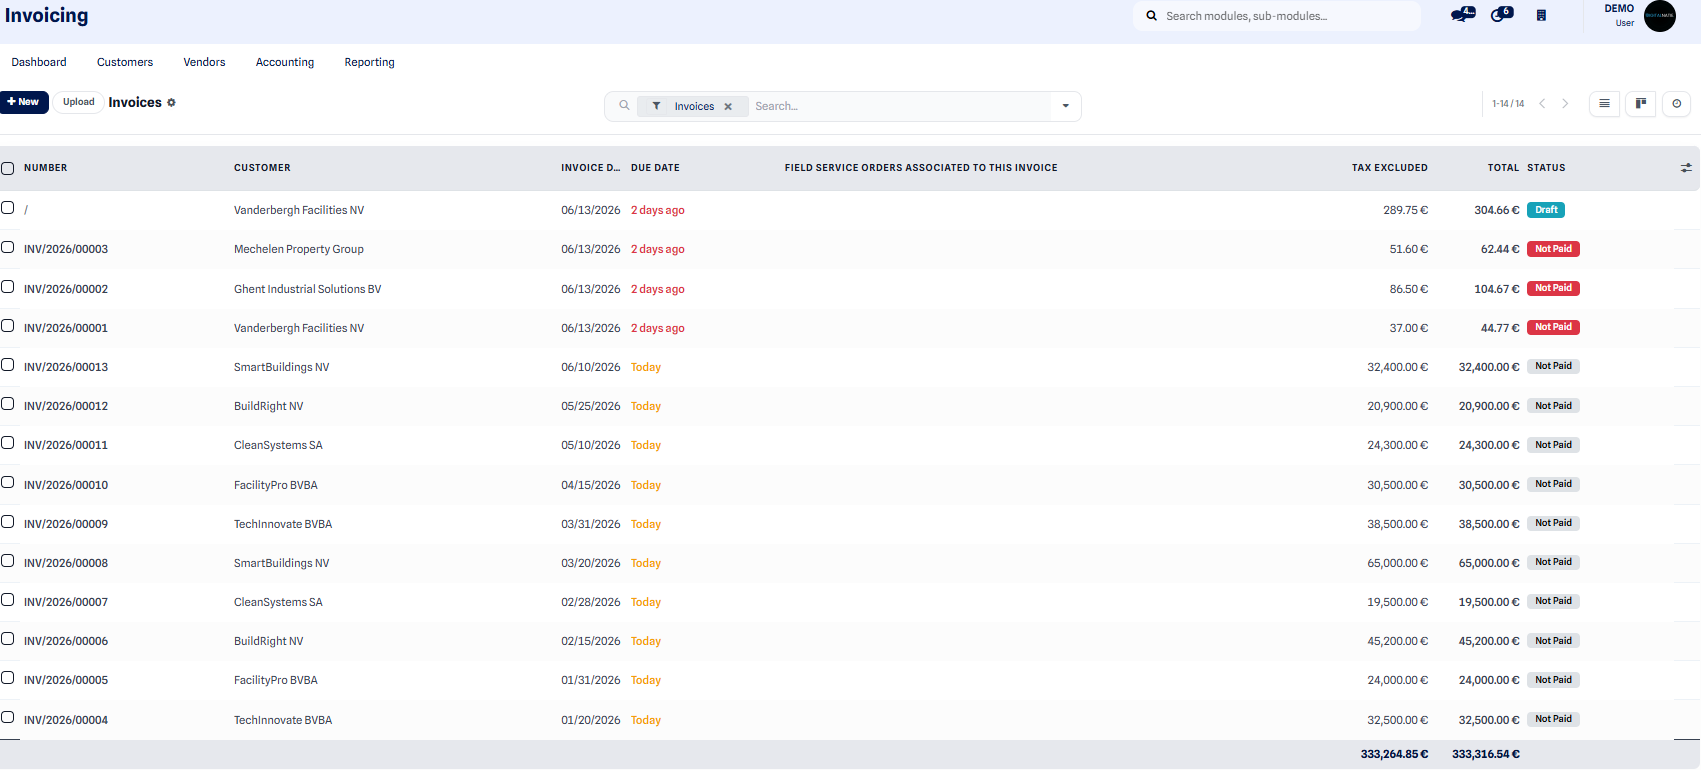 The invoice list shows the number, customer, amount and status of each invoice.
-
Open the invoicing Dashboard.
-
Look through the invoice list to find the one you need or to check the amounts outstanding.
-
Click New to start a blank invoice.
-
Add the invoice lines: services, parts, quantities and unit prices.
-
Confirm the invoice to validate it and assign its number.
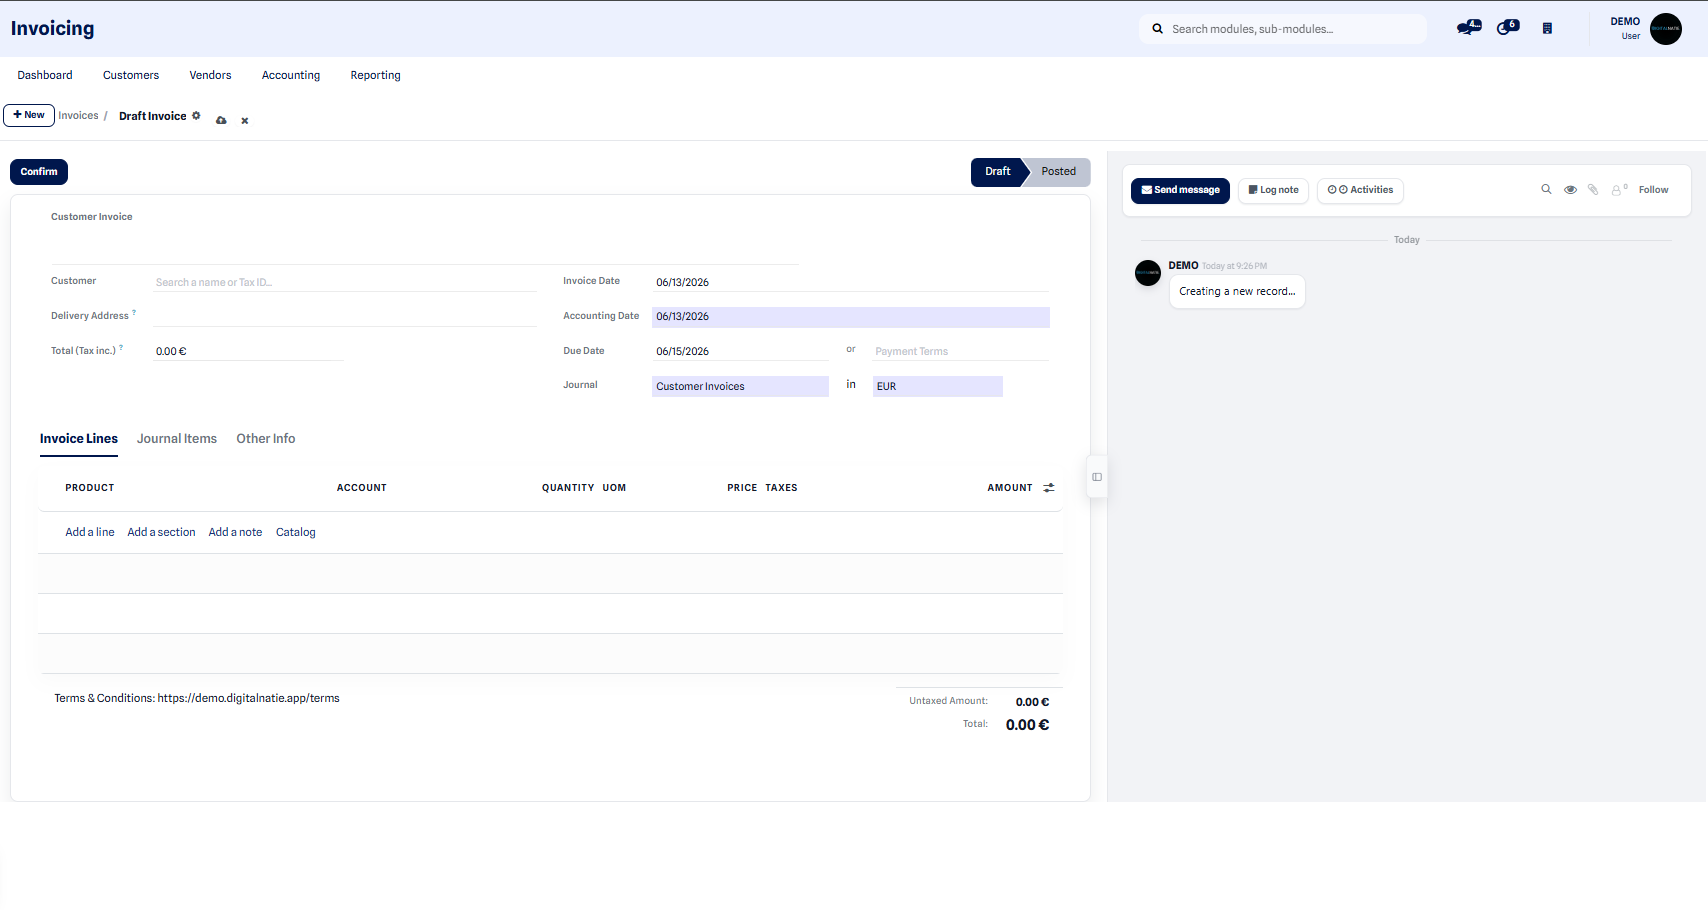 The new invoice form lets you enter the customer and the lines to be invoiced.
Result: a new Posted invoice, ready to be sent to the customer.
Record a customer payment
Section titled “Record a customer payment”When the customer pays their invoice, record the payment to move the invoice from unpaid to paid.
-
Open the relevant posted invoice.
-
Click Register payment.
-
Enter the amount, the date and the payment method.
-
Confirm: the invoice is marked as Paid.
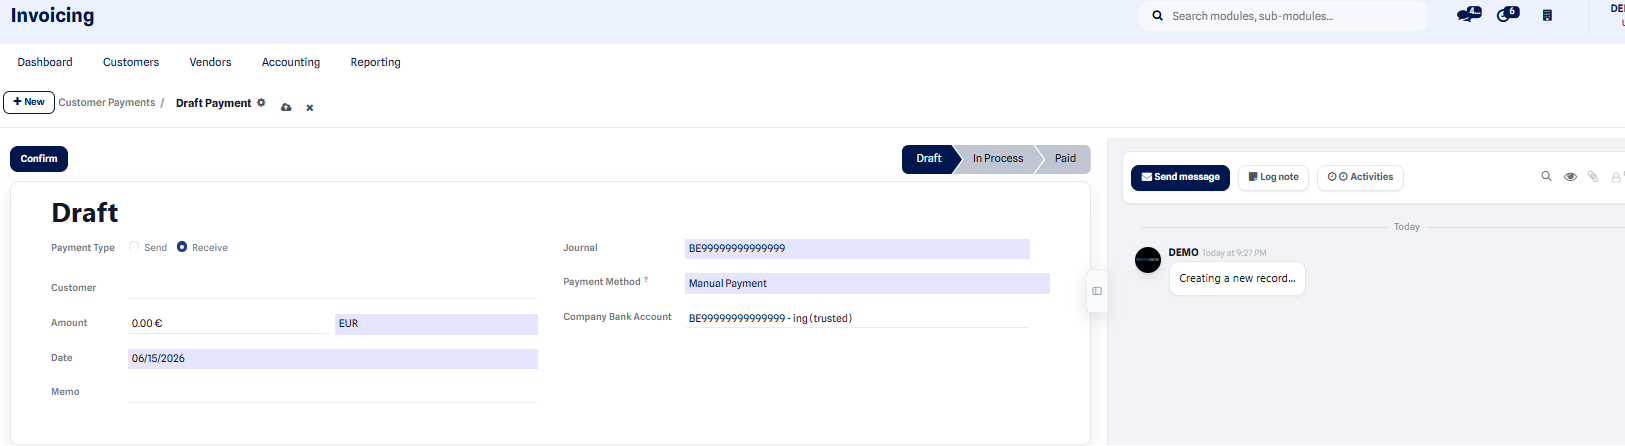 The customer payment screen records the amount and payment method received.
Create a credit note
Section titled “Create a credit note”A credit note is used to correct an invoice that has already been posted or to refund a customer, for example in case of an incorrect amount or a cancelled service.
-
Open the invoice to be corrected.
-
Click Add credit note.
-
Check the lines and amounts carried over to the credit note.
-
Confirm the credit note so that it is deducted from the amount due.
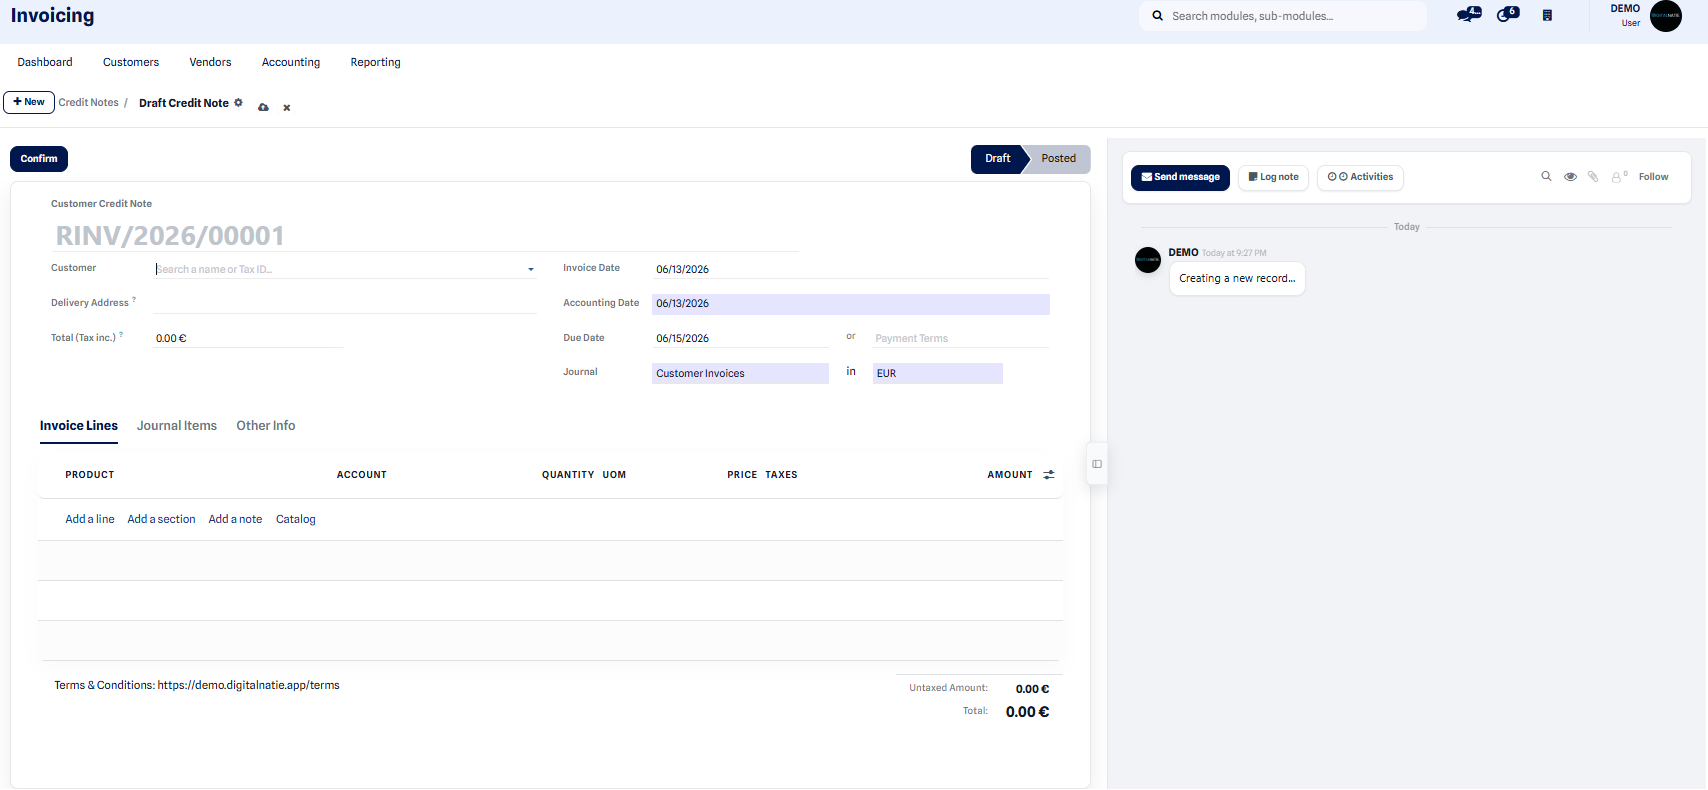 The credit note corrects or refunds an invoice that has already been posted.
Journal entries
Section titled “Journal entries”Each confirmed invoice automatically generates its journal entries, which you can review at any time for tracking.
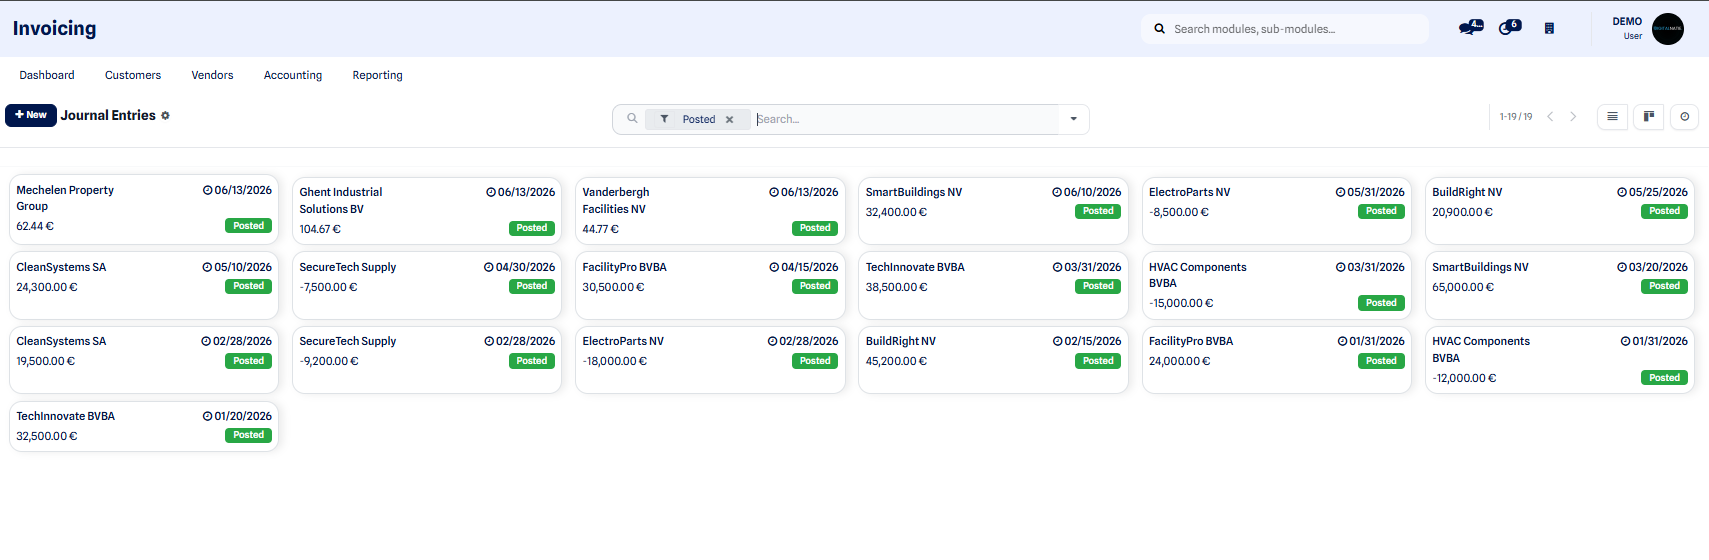 The journal entries detail the impact of each confirmed invoice.
Invoice statuses
Section titled “Invoice statuses”| Status | Meaning |
|---|---|
| Draft | Freely editable, not yet validated |
| Posted | Validated and numbered, ready to send to the customer |
| Paid | Payment received (the invoice goes from unpaid to paid) |
As long as an invoice is in Draft, you can correct it. Once Posted, it is final: it is then tracked as unpaid and then paid once payment is received.
From quotation to invoice
Section titled “From quotation to invoice”For the complete journey, from the approved quotation through to the invoice, see From quotation to invoice.