

Service Orders
The service order is the central object of Service Suite: it describes one intervention at one customer. From here you plan the work, assign a technieker, prepare parts, guard safety and follow everything through to closing.
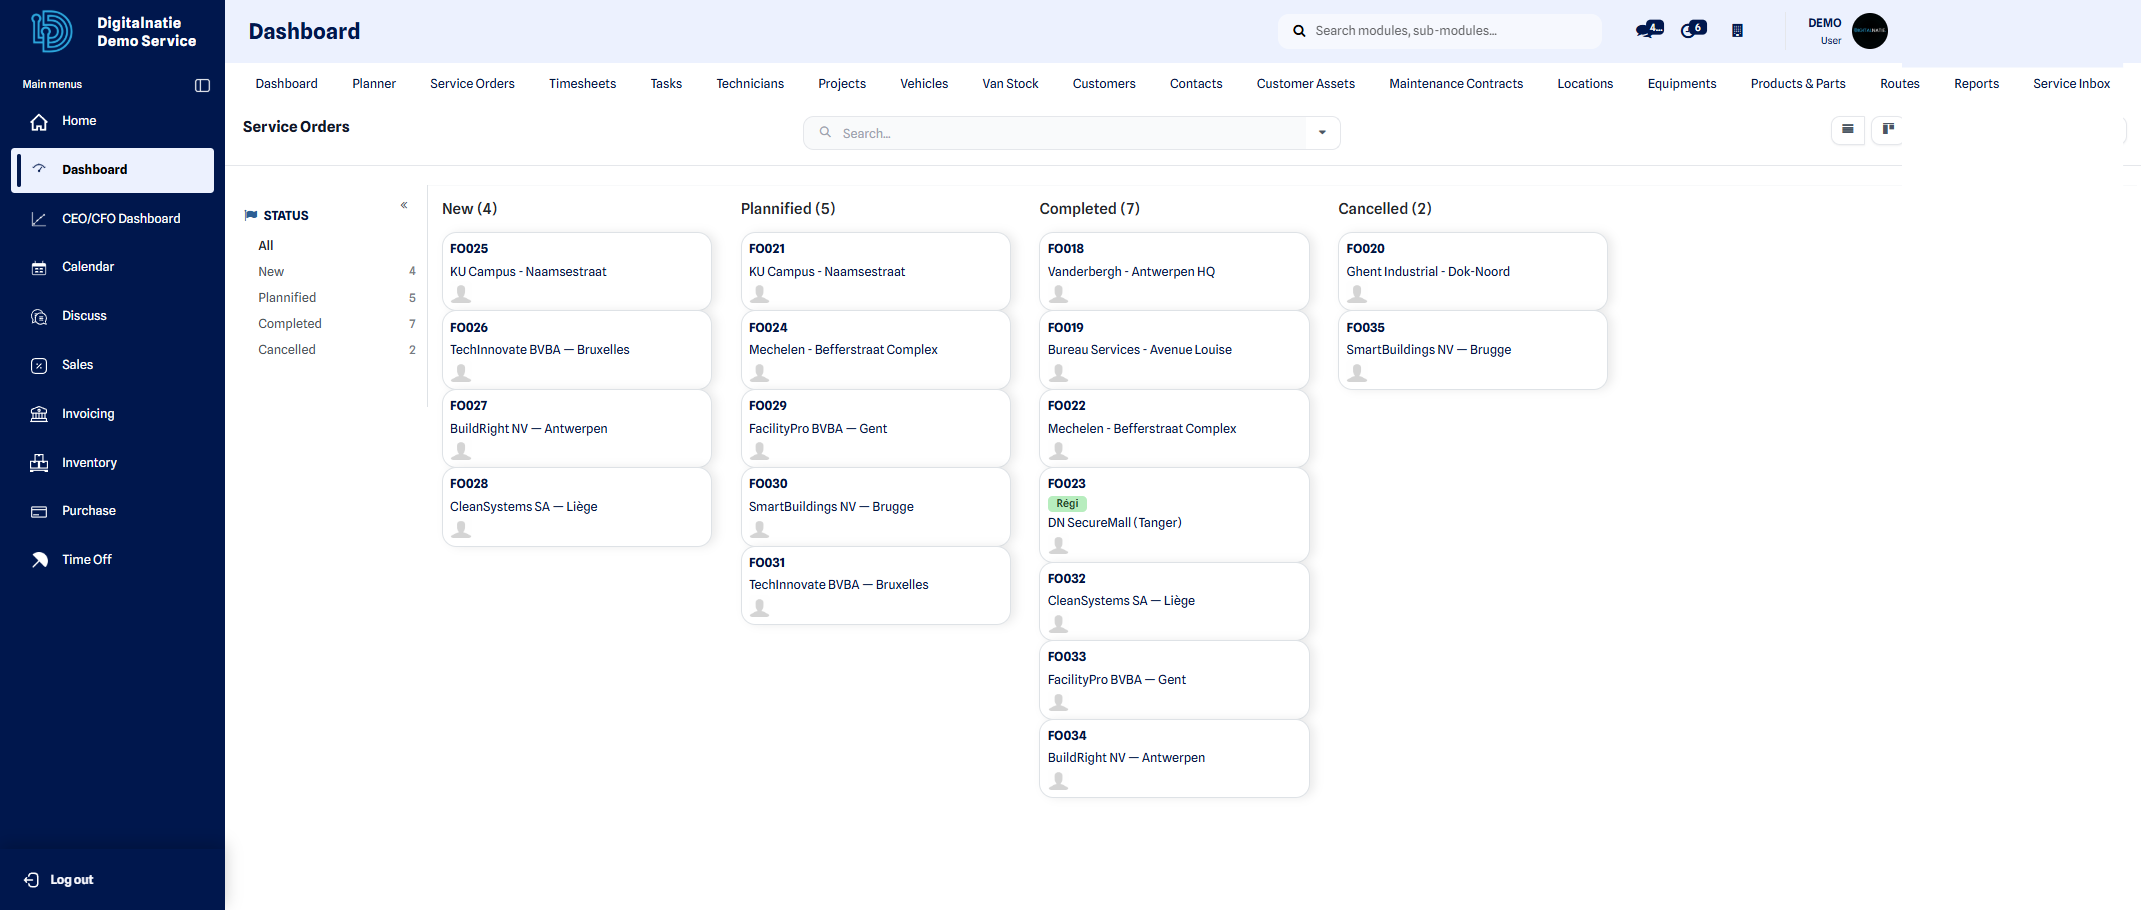 The service order list, showing the stage of each intervention.
The screen at a glance
Section titled “The screen at a glance”The order screen is built around five numbered steps in the main column, with a right-hand column that stays visible throughout.
| Step | About |
|---|---|
| 1 · Plan | Customer, location, type, priority, team, technieker, scheduling |
| 2 · Intervention | Description, resolution, instructions, directions, asset |
| 3 · Preparation | Parts & stock, equipment |
| 4 · Safety | PPE, LMRA, risks, procedures, checklists |
| 5 · Execution & history | Hours, parts used, report, photos, billing |
On the right sit Order Summary, Technieker, Schedule, Next Action and — if you have the safety modules — Operational Readiness.
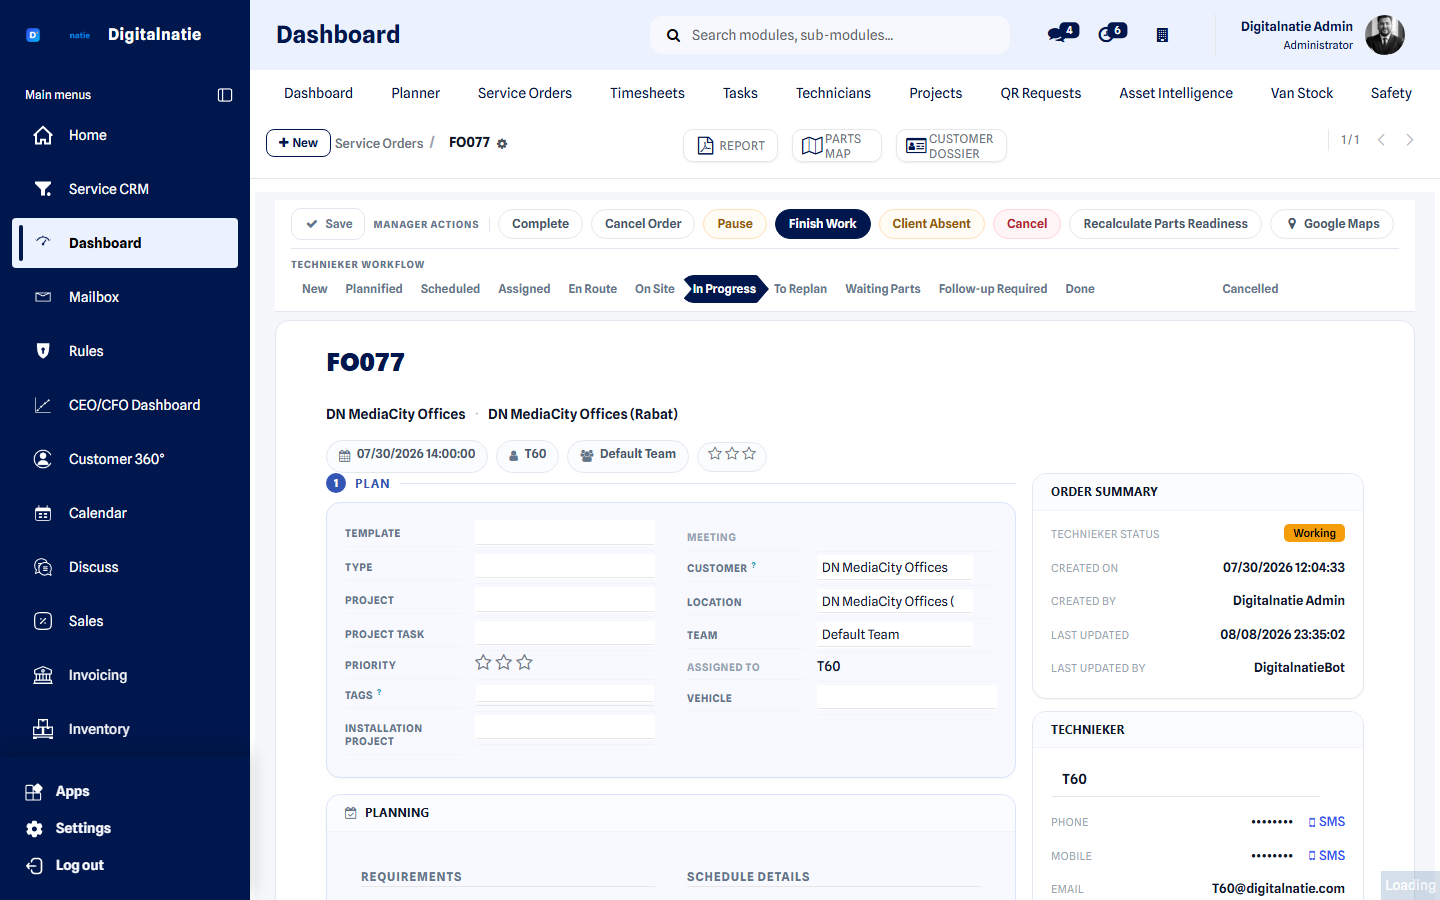 The order screen: steps in the main column, fixed context on the right.
The header: two zones that do different things
Section titled “The header: two zones that do different things”Two clearly separated zones sit at the top. That distinction is the heart of the redesigned screen.
Manager Actions
Section titled “Manager Actions”On the left. These are the buttons you operate as manager or planner — steering the intervention without waiting for the technieker:
| Button | What it does |
|---|---|
| Save | Saves the order without leaving the screen |
| Complete | Closes the intervention |
| Pause | Puts the work on hold |
| Finish Work | Wraps up the work on site |
| Client Absent | Nobody was there for the appointment |
| Cancel Order / Cancel | The intervention will not go ahead |
| Recalculate Parts Readiness | Re-checks what is ready |
| Google Maps | Opens the route to the location |
Above them sit Report, Parts Map and Customer Dossier.
Technieker Workflow
Section titled “Technieker Workflow”On the right. This is the stage bar: the official status of the intervention. You click it directly to set a stage.
Creating a service order
Section titled “Creating a service order”-
Open Dashboard → Service Orders and click New.
-
In step 1, fill in the customer and the intervention location.
-
Choose the type and priority. Priority is clicked directly on the title.
-
Assign the team and the technieker.
-
Set the schedule: start date, estimated duration, and optionally the time window within which the customer can receive a visit.
-
Describe the problem under Description in step 2.
-
Click Save in the Manager Actions zone.
Result: the order appears on the Planning and — as soon as a technieker is assigned — in their Technieker app.
Assigned technieker versus requested workers
Section titled “Assigned technieker versus requested workers”This is the most important distinction on the whole screen, and the mistake that most often causes an intervention to go undispatched.
| Assigned technieker | Requested workers | |
|---|---|---|
| Where | Technieker card, right | Collapsible block at the bottom of Plan |
| How many | One | Several |
| Receives the job in My Jobs | Yes | No |
| Sees the job in the mobile app | Yes | No |
| Gets read access in the back office | Yes | Yes |
| Counts for hours and planning | Yes | No |
Step 3 — preparing parts
Section titled “Step 3 — preparing parts”The Parts & Stock card shows four values. Reading them together is the only way to know whether anything is ready.
| Field | What it means |
|---|---|
| Prepared Transfers | How many preparations have been created for this order in total — including completed ones |
| Open Preparation | The preparation still in progress. Empty once it is validated or cancelled |
| Picking Status | The status of that in-progress preparation |
| Lines to Pick | How many lines in it still have to be picked |
Prepare Parts creates a new warehouse-to-van preparation. Transfers shows everything that has already moved for this order. See also Parts Readiness.
Step 4 — safety
Section titled “Step 4 — safety”The Safety requirements card summarises what this intervention is required to do: the effective LMRA requirement, how much PPE is required and how much of it is critical, how many risks apply, how many documents must be read and how many checklists are assigned.
Below it sit collapsible blocks per subject, each with its own status.
On the right, Operational Readiness summarises everything in one badge:
| Badge | Meaning |
|---|---|
| Ready | Nothing prevents the start |
| Action needed | Something is open, but it does not block |
| Blocked | The work may not start |
Step 5 — execution, report and billing
Section titled “Step 5 — execution, report and billing”Under Execution & history sit the tabs filled during and after the work: hours, parts used, report, photos, timeline, activities and billing.
The report section groups materials used, evidence (photos and signature) and the report status.
AI Assistant
Section titled “AI Assistant”Where the AI report assistant is active, it appears as its own block with Input, AI actions and Result. It proposes text based on what is on the order; the technieker or the manager still reviews and confirms it. See AI Report Assistant.
The twelve stages
Section titled “The twelve stages”| Stage | Meaning |
|---|---|
| New | Created, not yet planned |
| Plannified | Taken into the planning |
| Scheduled | Date and time slot fixed |
| Assigned | A technieker is assigned |
| En Route | The technieker is travelling to the site |
| On Site | The technieker has arrived |
| In Progress | The work is under way |
| To Replan | The visit must be rescheduled |
| Waiting Parts | Paused until parts arrive |
| Follow-up Required | A follow-up action is needed |
| Done | Fully completed and closed |
| Cancelled | Will not take place |
How technieker actions become stages
Section titled “How technieker actions become stages”The backend stage is authoritative. What the technieker does in the app is translated automatically:
| Technieker action | Stage |
|---|---|
| Depart | En Route |
| Arrived | On Site |
| Start work | In Progress |
| Fully completed | Done |
| Partially completed | To Replan |
| Customer absent | To Replan |
| Parts missing | Waiting Parts |
| Follow-up required | Follow-up Required |