Sites & locations
The Sites & locations page is used to record and structure the places where your teams operate: customer sites, buildings, floors, or specific zones. Each site centralizes the information needed to prepare and track interventions.
When to use it
Section titled “When to use it”Use this page whenever a customer has multiple sites, or when a single site contains several pieces of equipment or several zones to distinguish. Properly structuring your sites makes scheduling, technician assignment, and asset tracking easier.
Create a site or location
Section titled “Create a site or location”- Open Customers & assets > Sites & locations, then click New.
- Enter the Name of the site or location (for example, the name of the building or zone).
- If this location is part of a larger site, select a Parent site to make it a sub-location.
- Link the Owner / Associated customer to attach the site to the correct account.
- Fill in the full Address and the on-site Main contact.
- Set the linked Route and inventory location, if you use them.
- Click Save.
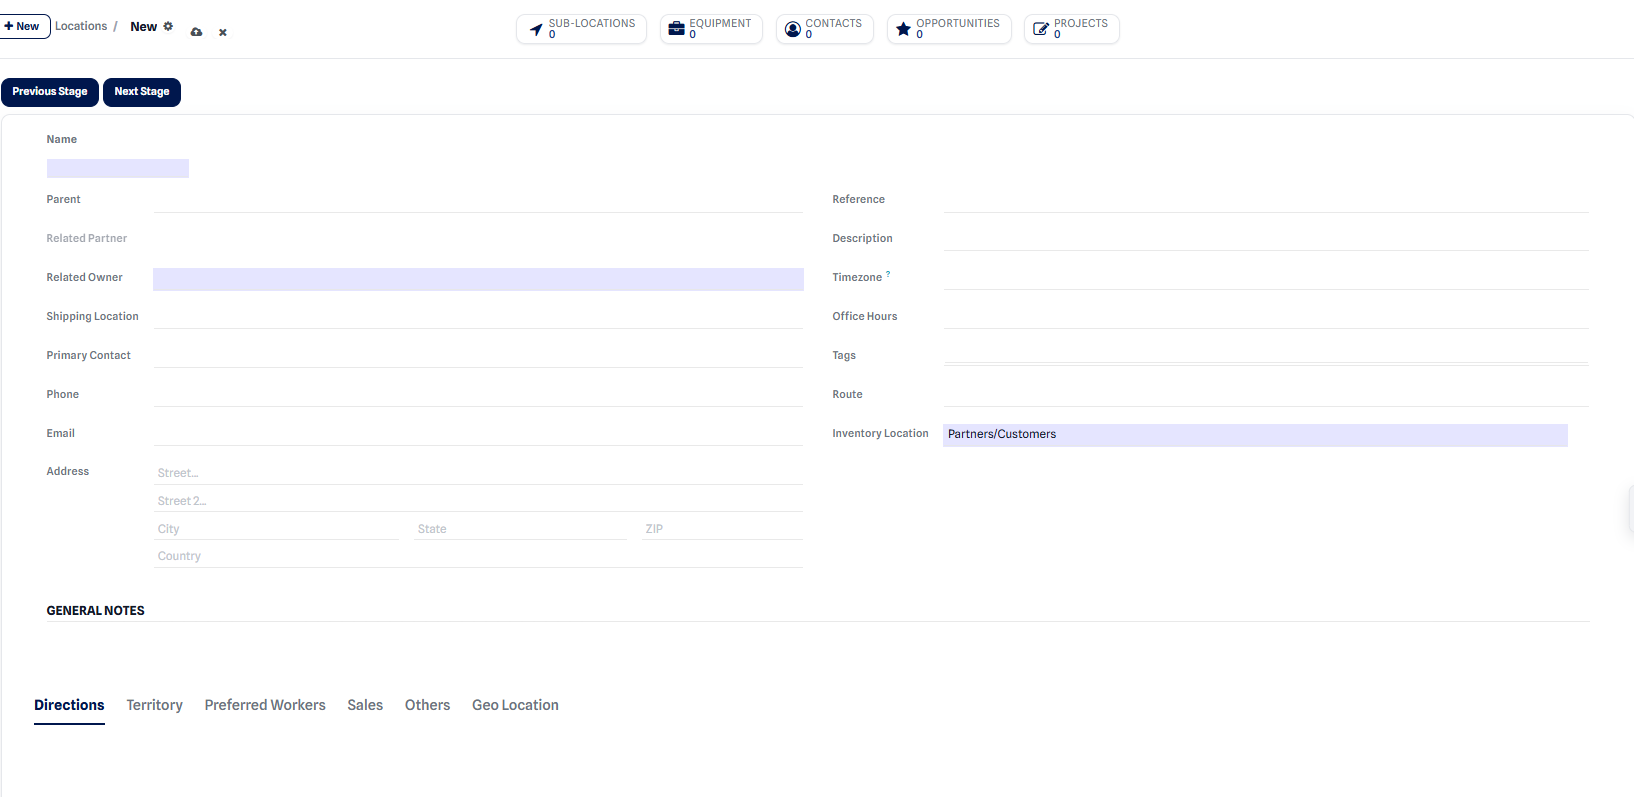 Form for creating an intervention site.
Expected result: the site appears in the list and becomes selectable when creating service orders, equipment, or contracts.
What can be attached to a site
Section titled “What can be attached to a site”A site groups and organizes several business items:
- Sub-locations: buildings, floors, or zones within the same site.
- Equipment: the assets installed on site (see Equipment).
- Contacts: the people present at the site.
- Opportunities and projects linked to the intervention location.
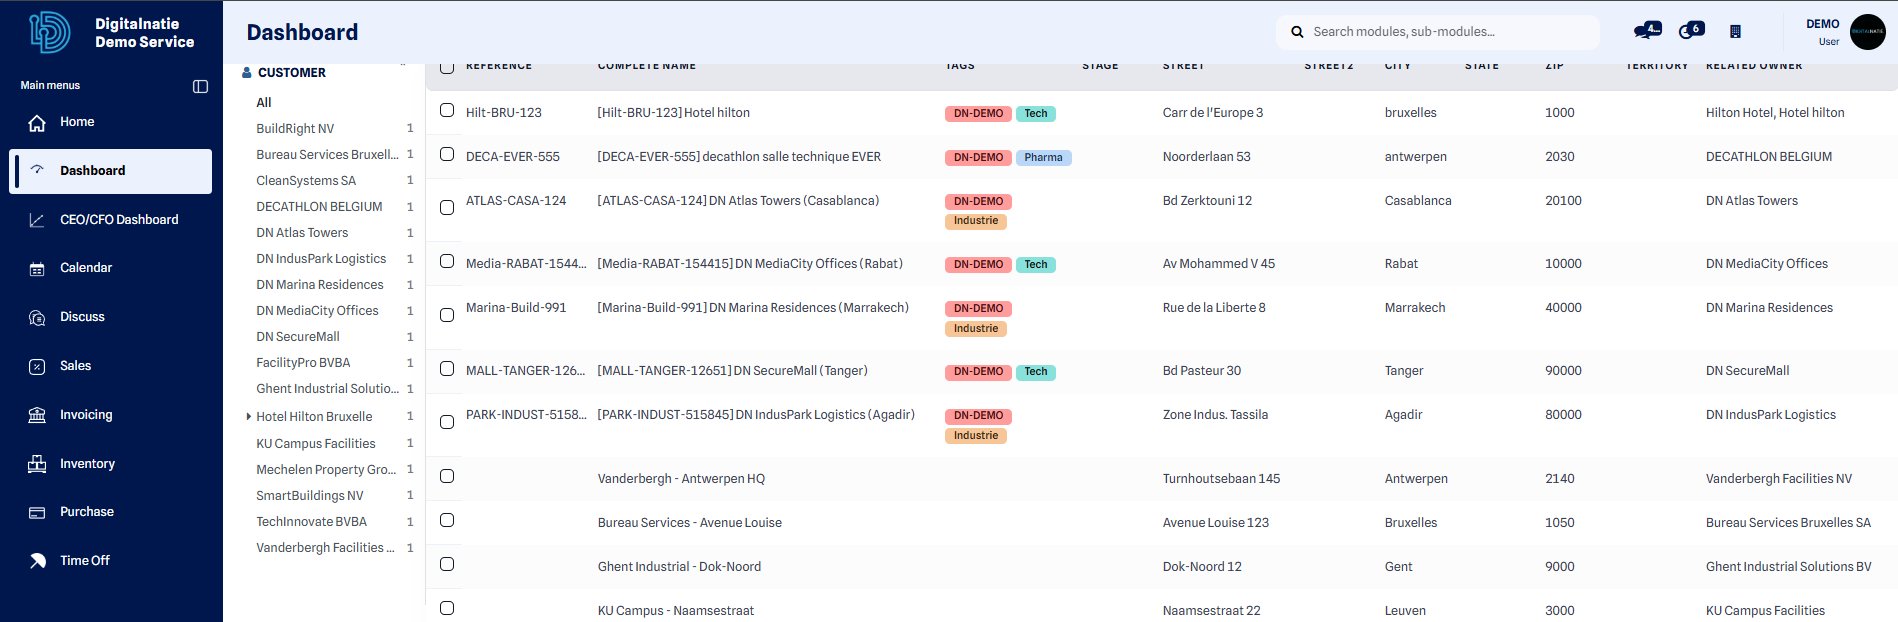 List view to quickly find and filter your sites.
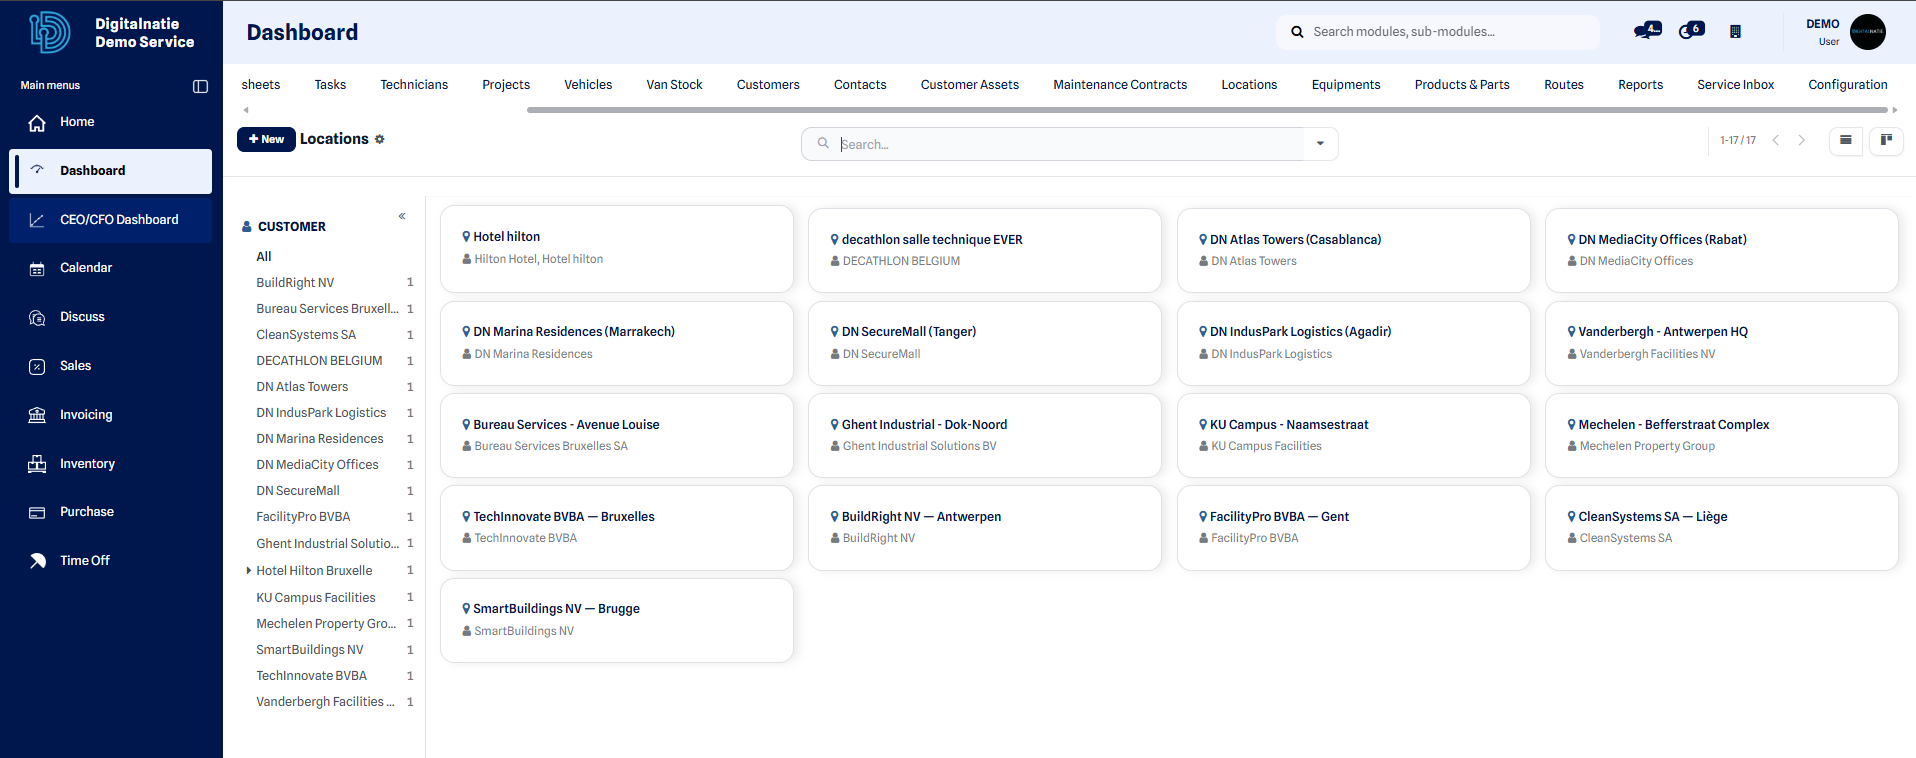 Kanban view for a visual overview of your sites.
To manage the assets installed at these sites, see the Customers & assets page.