Time Off
The Time Off menu lets each employee request a leave (paid time off, time in lieu, sick leave, etc.) and lets the manager approve or reject these requests, then allocate balances to their team. The overview brings together all requests in one place, as a calendar, so you can see at a glance who is away and when.
When to use it: as soon as an employee wants to request time off, or when the manager needs to handle pending requests and assign the year’s leave balances.
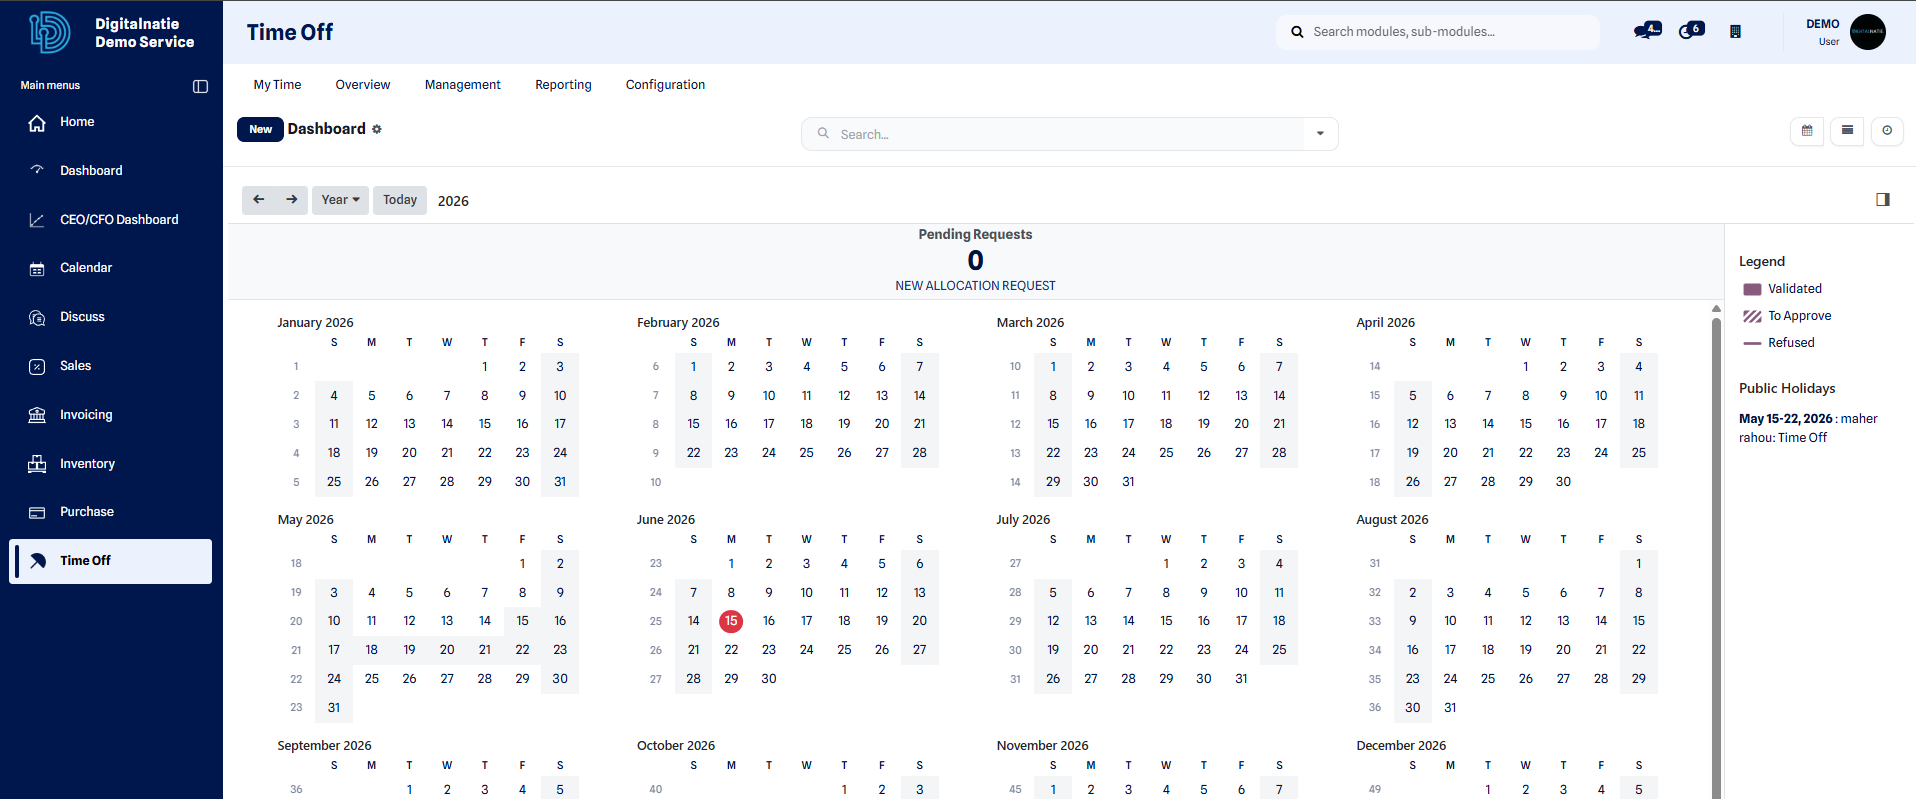 Time off overview: calendar of absences and the status of each request.
Request time off
Section titled “Request time off”This procedure creates a leave request that will then be submitted to the manager for approval.
- Open the Time Off menu and check the overview to verify your available balance and the time off already booked.
- Click New to create a request.
- Select the type of leave (paid time off, sick leave, time in lieu, etc.) and the start and end dates of your absence.
- Add a description or a supporting document if needed (reason, document to attach).
- Click Save.
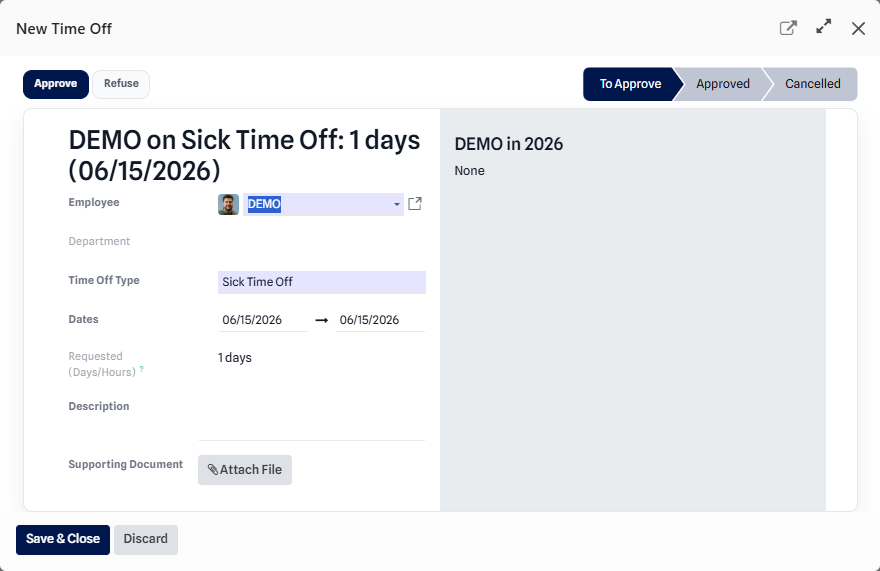 From the overview, the New button opens a blank time off request.
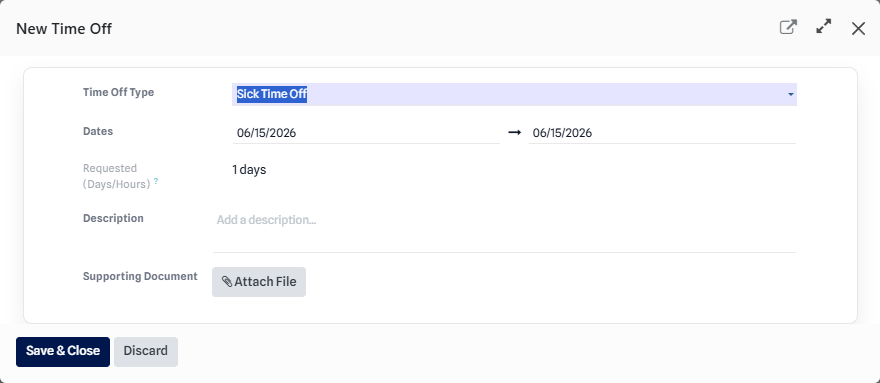 Completed request: leave type, dates and description before saving.
Result: the request appears in the overview with the status To Approve and is forwarded to the manager for validation.
Manager approval
Section titled “Manager approval”From the overview, the manager finds all their team’s requests and can approve or reject them in one click. The status of each request is identified by a color:
| Status | Meaning |
|---|---|
| To Approve | Request submitted, awaiting the manager’s decision. |
| Approved | Request approved: the absence is confirmed. |
| Refused | Request rejected: the absence is not granted. |
Once the decision is made, the employee is notified and the overview updates automatically. An Approved absence appears in the calendar and is taken into account by the planning, so that no intervention is assigned to a technician who is away.
Allocate time off
Section titled “Allocate time off”In addition to approving requests, the manager assigns each employee a leave balance through an allocation. This balance is what the employee can then book throughout the year.
- Open the Time Off menu, then the Allocations section.
- Click New to create an allocation.
- Select the relevant employee and the type of leave to assign.
- Enter the number of days (or hours) allocated for the period.
- Click Save, then validate the allocation.
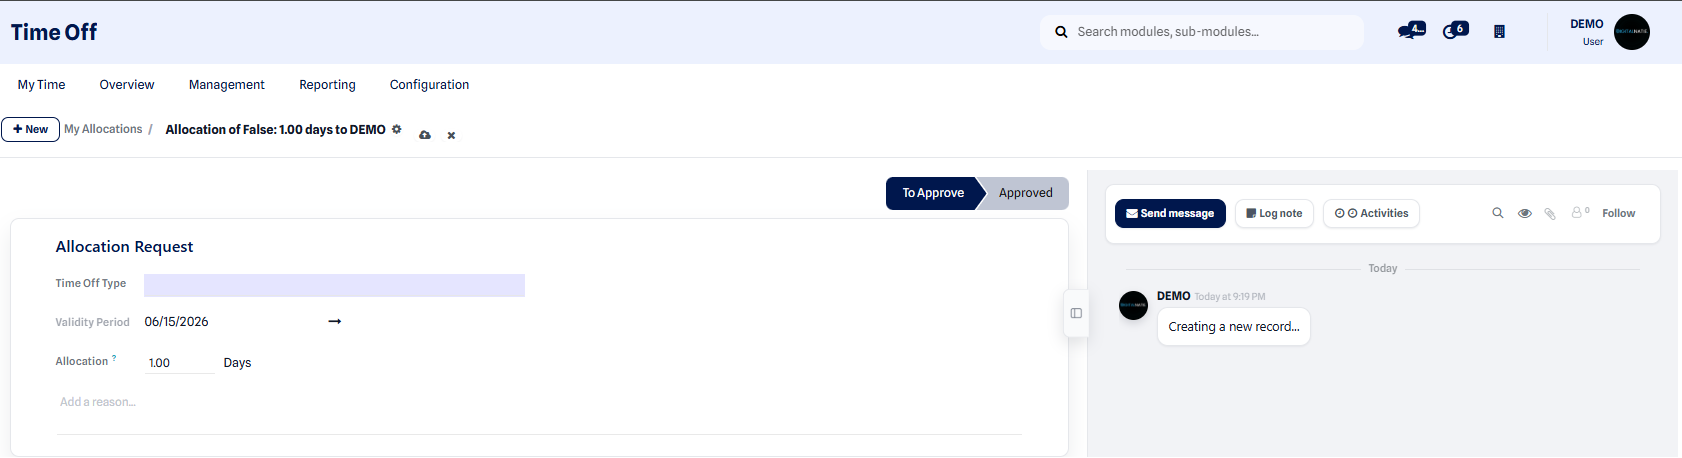 Allocation form: employee, leave type and number of days assigned.
Expected result: the allocated balance is added to the employee’s counter. The employee can now book time off within the limit of available days, and the overview reflects the remaining balance after each approved absence.