

Users, roles and permissions
Each person in your company has their own account. What they see and what they can do depends on the roles your company administrator assigns to them. This page explains how roles work, and how to invite an employee, give them roles, deactivate them and manage their password.
| Menu | Instellingen › Rollen (employees, roles, log) and Configuratie › Gebruikers (user record) |
| Who | your company administrator (Company Administrator and CEO / Owner templates, Beheerder badge) |
| Prerequisites | the employee’s e-mail address; for a technician, their technician record |
How roles work
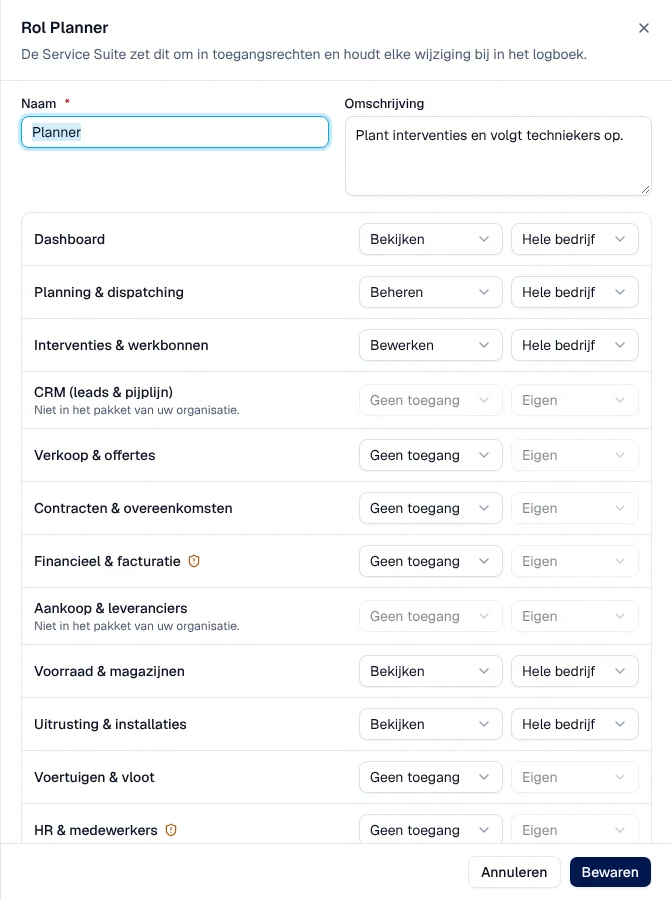
Section titled “How roles work”A role is built module by module (“onderdeel”): planning, interventions, sales, finance, stock, installations, reports… For each module, the role sets:
- a level: Geen toegang (no access), Bekijken (view), Aanmaken (create), Bewerken (edit), Verwijderen (delete) or Beheren (manage);
- a scope: Eigen (own items), Team (team), Afdeling (department), Vestiging (branch), Regio (region) or Hele bedrijf (whole company);
- for some modules, an extra permission: Goedkeuren (approve, for leave and working time) or Exporteren (export, for reports).
A person can have several roles: their permissions are the sum of their roles. A module that your plan does not include is greyed out: “Niet in het pakket van uw organisatie.” (not in your organisation’s plan).
The standard roles
Section titled “The standard roles”Your organisation starts with template roles (Sjabloon badge). The guides group them into families:
| Family | Templates in Rollen |
|---|---|
| Administrator | Company Administrator, CEO / Owner |
| Manager | Operations Manager, Field Service Manager |
| Planner | Dispatcher, Planner / Scheduler |
| Technician | Technician, Senior Technician |
| Accounting | Accountant, Finance Manager |
| Warehouse | Warehouse Manager, Warehouse Employee |
| Sales | Sales Manager, Sales, Sales Representative, Directie |
| Read only | Read-only Auditor |
| Mailbox | Mailbox User |
What each family sees and does, screen by screen and action by action, is in Roles and permissions.
Inviting an employee
Section titled “Inviting an employee”-
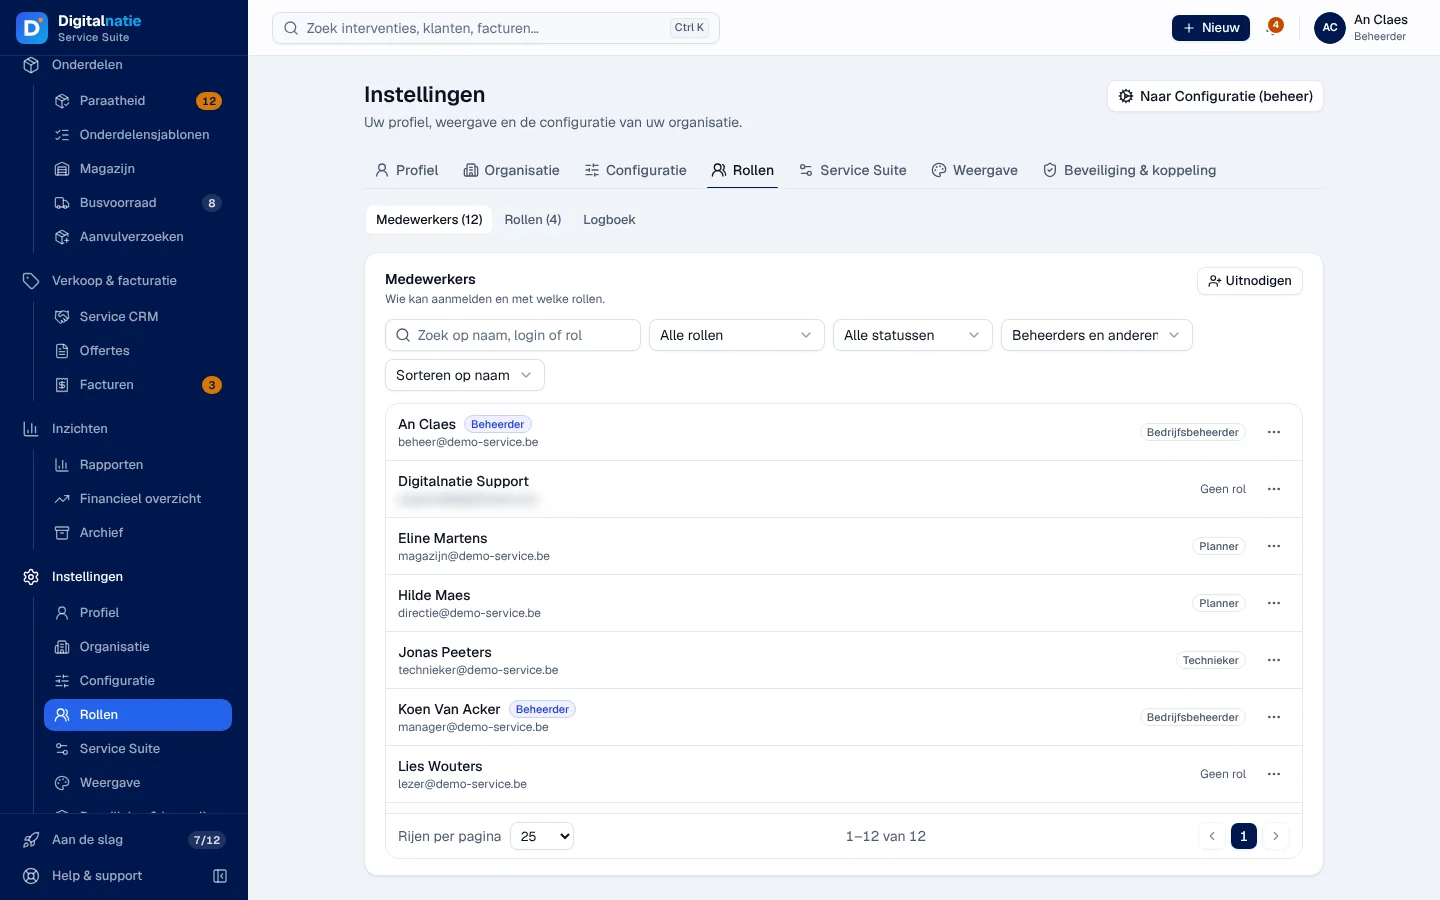
Open Instellingen › Rollen, Medewerkers (employees) view.
-
Click Uitnodigen (invite).
-
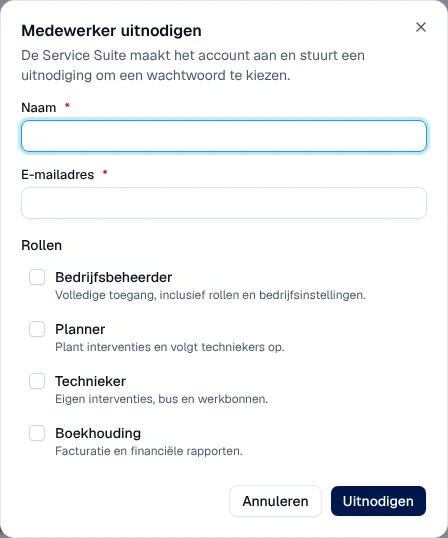
Enter Naam (name) and E-mailadres, tick one or more Rollen.
-
Click Uitnodigen.
Result: “Uitnodiging verstuurd naar …” (invitation sent). The account is created and the person receives a real e-mail with a link to choose their password (see Sign in). The link can only be used once and expires.
If the e-mail cannot be sent, the message says “… toegevoegd (geen e-mail verstuurd)” (added, no e-mail sent): in that case, create an activation link on their record (see below).
Assigning or removing roles
Section titled “Assigning or removing roles”-
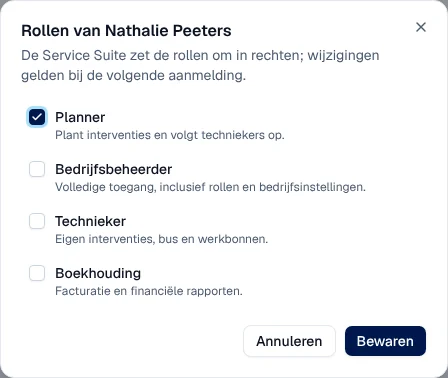
In Medewerkers, click … at the end of the row, then Rollen wijzigen (change roles).
-
Tick or untick the roles.
-
Click Bewaren (save).
Result: “Rollen van … bewaard” (roles saved). Each change is recorded in the log.
- Only the company administrator can give the administrator role: “Alleen een bedrijfsbeheerder kan deze rol toekennen.”
- If the new roles make the person a Techniekers-app user, the Techniekersfiche voor … (technician record) window asks you to link them to a technician record: choose Nieuwe fiche aanmaken voor … (create a record) or an existing record, then Rollen bewaren en koppelen. Nothing is saved before this choice.
- A person without any role no longer sees anything after signing in.
Creating or adapting a role
Section titled “Creating or adapting a role”-
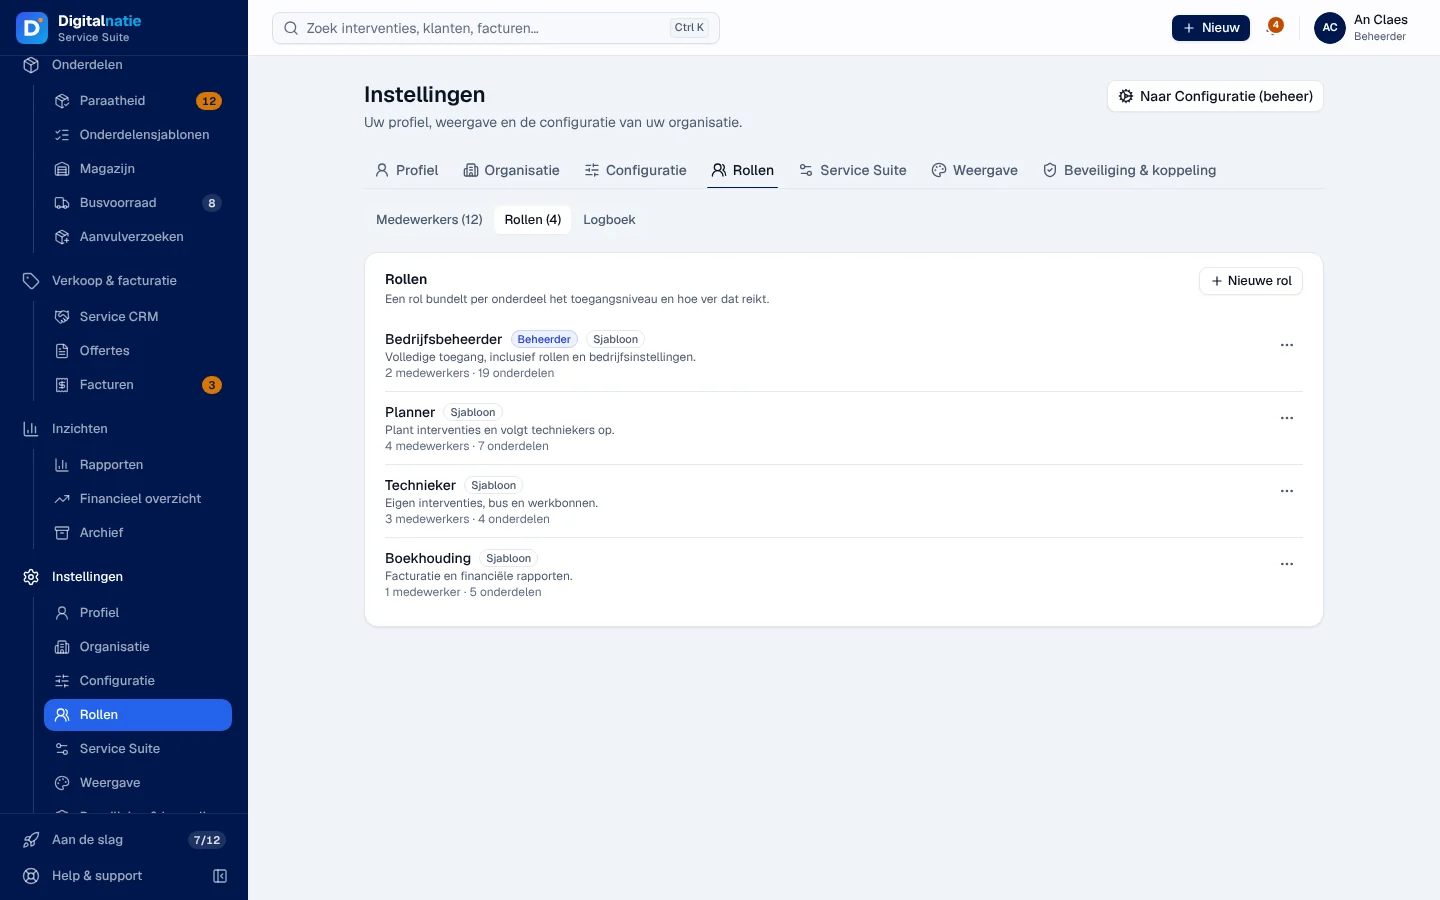
In Instellingen › Rollen, open the Rollen view.
-
Click Nieuwe rol (new role), or … on a role then Bewerken (edit). The same menu offers Dupliceren (duplicate), Sjabloon herstellen (restore template) and Verwijderen (delete).
-
Enter a Naam and an Omschrijving (description), then choose the level and scope for each module. An icon flags the modules with sensitive data (finance, personnel, integrations, settings, roles).
-
Click Bewaren.
Result: “Rol … bewaard”. If the role is already assigned, the application first asks “Rol … wijzigen voor N gebruikers?” with the before / after: Voor iedereen wijzigen (change for everyone) applies it to everyone who has this role. To change the permissions of a single person, use Rechten alleen voor deze gebruiker… on their record instead.
- Dupliceren creates a new role with the same permissions; nobody gets it until you assign it.
- Sjabloon herstellen replaces the permissions with those of the template: your adaptations are lost.
- Verwijderen removes this role from everyone who has it. The administrator role cannot be deleted.
A user’s record
Section titled “A user’s record”Configuratie › Gebruikers lists all accounts. The Beschermd (protected) badge marks the Digitalnatie support account, which is not managed here. There is no create button in this list: you invite people from Instellingen › Rollen.
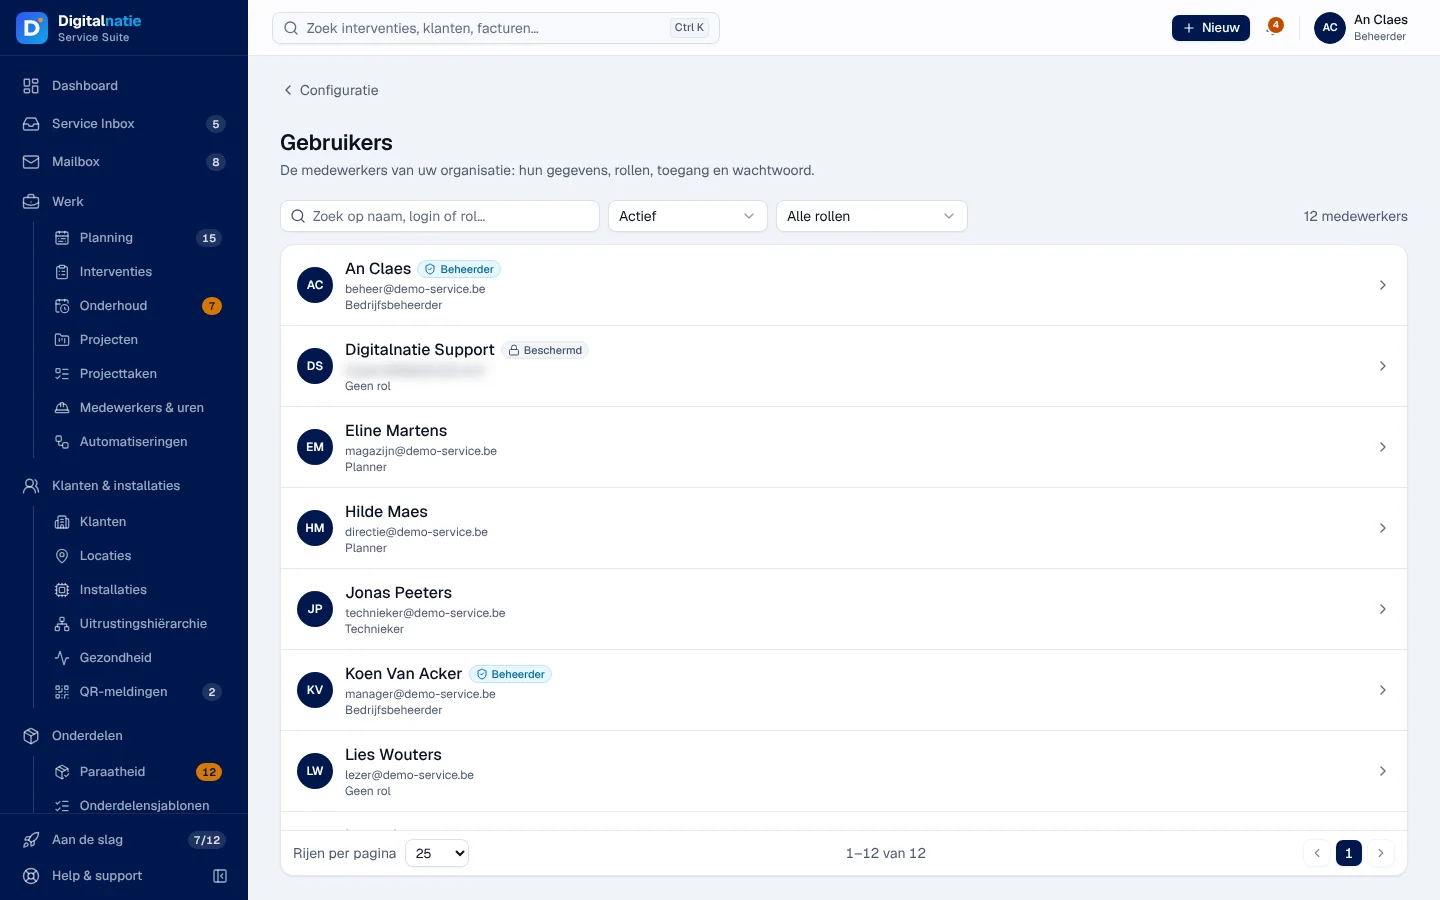
Click a person to open their record: Profiel, Rollen en toegang (roles and access), Uren (hours), Competenties en regio’s (skills and regions) and Contract en verloning (contract and pay) tabs, with the Samenvatting (summary: status, roles, two-step verification, last sign-in) on the right.
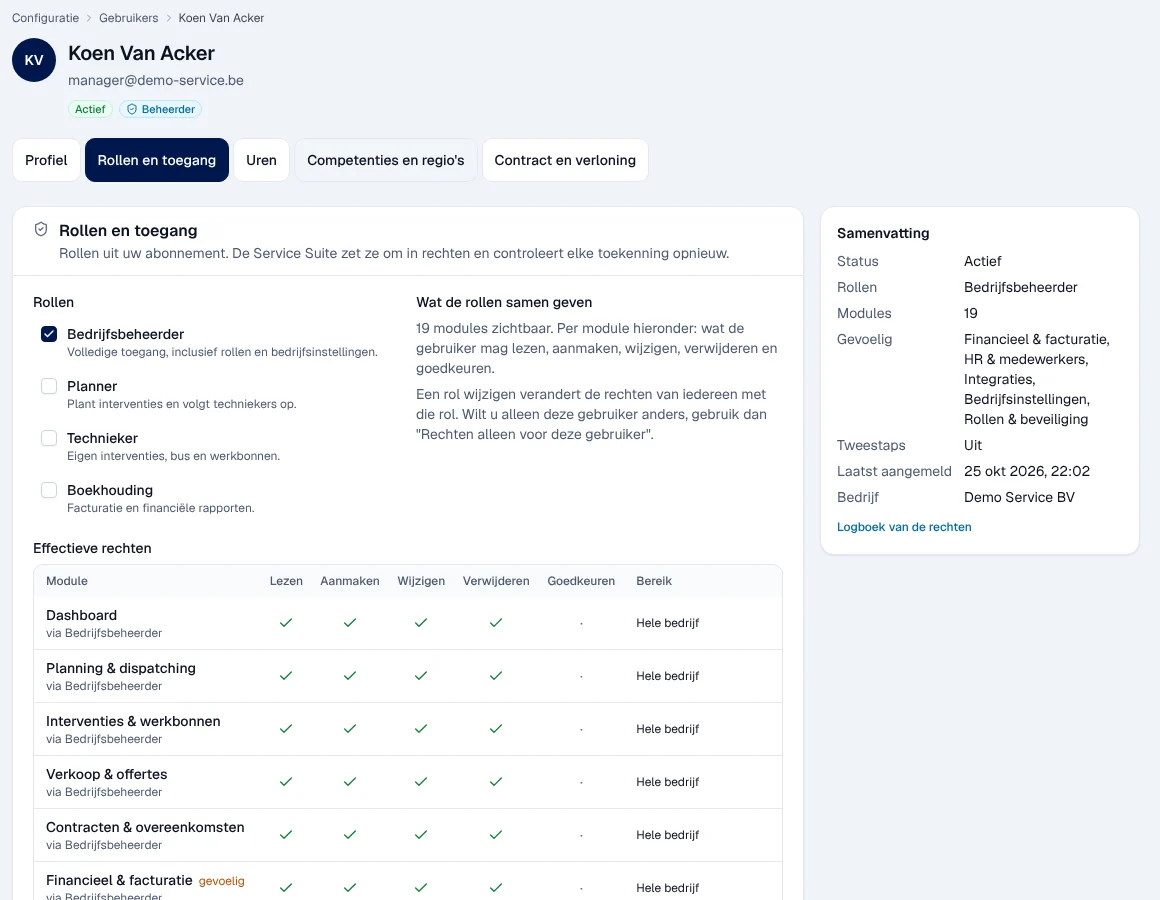
The Rollen en toegang tab shows Effectieve rechten (effective permissions) module by module, and where each permission comes from. The last active administrator always keeps their role: “Dit is de laatste actieve beheerder: de beheerdersrol blijft.”. Private personnel data is only visible to the administrator.
Deactivating an account
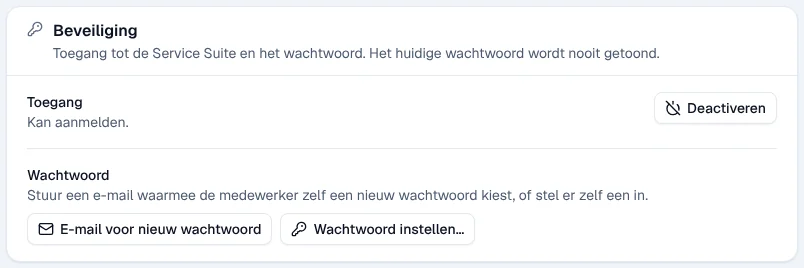
Section titled “Deactivating an account”In Medewerkers, … › Deactiveren, or on the record, Beveiliging (security) block › Deactiveren.
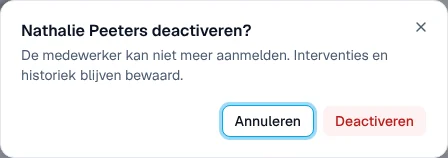
Result: “… kan niet meer aanmelden” (can no longer sign in). All the person’s sessions are closed, including in the Techniekers-app; work not yet sent from the app stays on the device. Interventions and history are kept. Opnieuw activeren (reactivate) gives them access again. You cannot deactivate your own account, nor the last administrator.
Managing an employee’s password
Section titled “Managing an employee’s password”On the record, Rollen en toegang tab, Beveiliging block:
-
E-mail voor nieuw wachtwoord (e-mail for a new password) sends, after confirmation, a real e-mail with a link. Not possible if the account is deactivated, if it has no e-mail address, or if your company e-mail is not connected yet (“E-mail niet beschikbaar: …”).
-
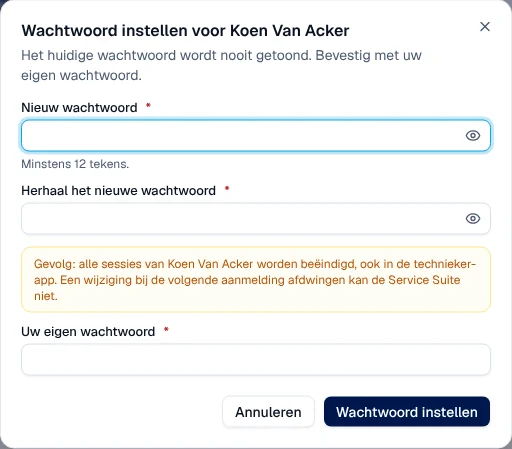
Wachtwoord instellen… (set password): enter the new password twice and confirm with Uw eigen wachtwoord (your own password; also your code if your two-step verification is on).
-
Activatielink maken (create activation link) only appears for an active account that has never signed in. The link can be used once, stays valid for a few hours and is shown only once (Kopiëren to copy it).
The log
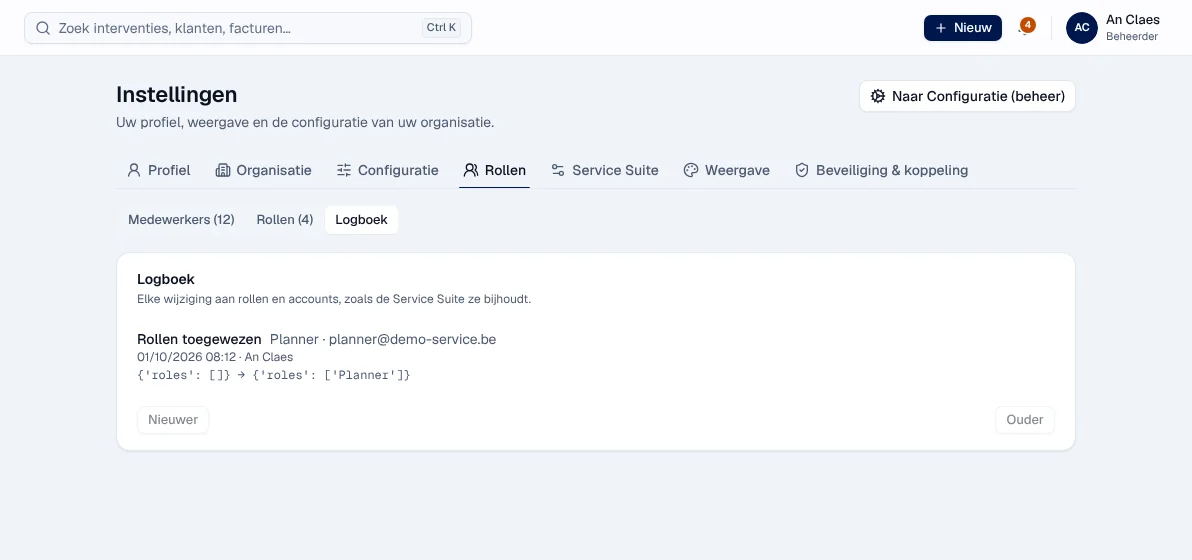
Section titled “The log”The Logboek (log) view of Instellingen › Rollen lists every change to roles and accounts: action, role and person concerned, date, author, before → after. Nieuwer / Ouder (newer / older) move through the pages.
Rights by role
Section titled “Rights by role”The table shows the supplied role templates (see Roles and permissions); the administrator can adjust them (see above).
| Action | Admin | Manager | Planner | Accounting | Warehouse | Sales | Read |
|---|---|---|---|---|---|---|---|
| Invite, assign roles, deactivate (Instellingen › Rollen) | ✓ | — | — | — | — | — | — |
| Create, edit, delete a role | ✓ | — | — | — | — | — | — |
| Give the administrator role | ✓ | — | — | — | — | — | — |
| User record, password, activation link | ✓ | — | — | — | — | — | — |
| Link a user to a technician record | ✓ | ✓ | — | — | — | — | — |
| Read your own permissions (Profiel › Rechten) | ✓ | ✓ | ✓ | ✓ | ✓ | ✓ | ✓ |
Current limits
Section titled “Current limits”- The modules of your plan (“Niet in het pakket van uw organisatie.”) cannot be changed in the application: ask Digitalnatie.
- A password set by the administrator cannot be forced to change at the next sign-in.
See also
Section titled “See also”- Roles and permissions — the detail by action
- Sign in and protect your account
- Team, absences and hours — technician records
- Settings (Instellingen)
- Connect your e-mail — needed for e-mail invitations