

Finding your way: menu, search, lists, notifications
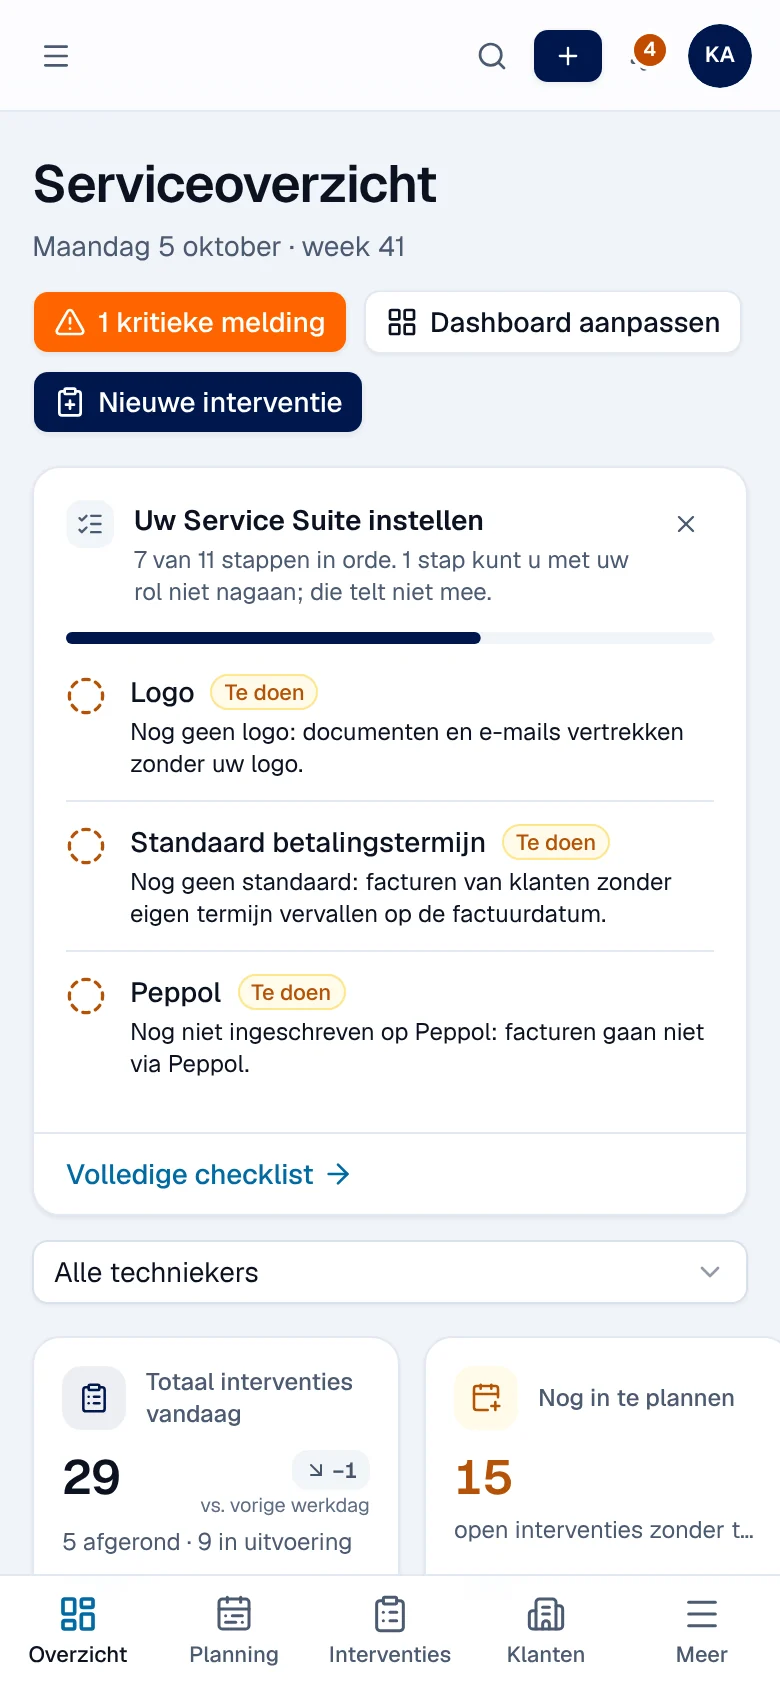
The office application keeps the same structure everywhere: the menu on the left, a bar at the top with search, the Nieuw (new) button, notifications and your account, and the page in the middle. This page helps you find your way around, whatever your job.
| Who | all office users |
| What you see | only the modules included in your plan and your permissions |
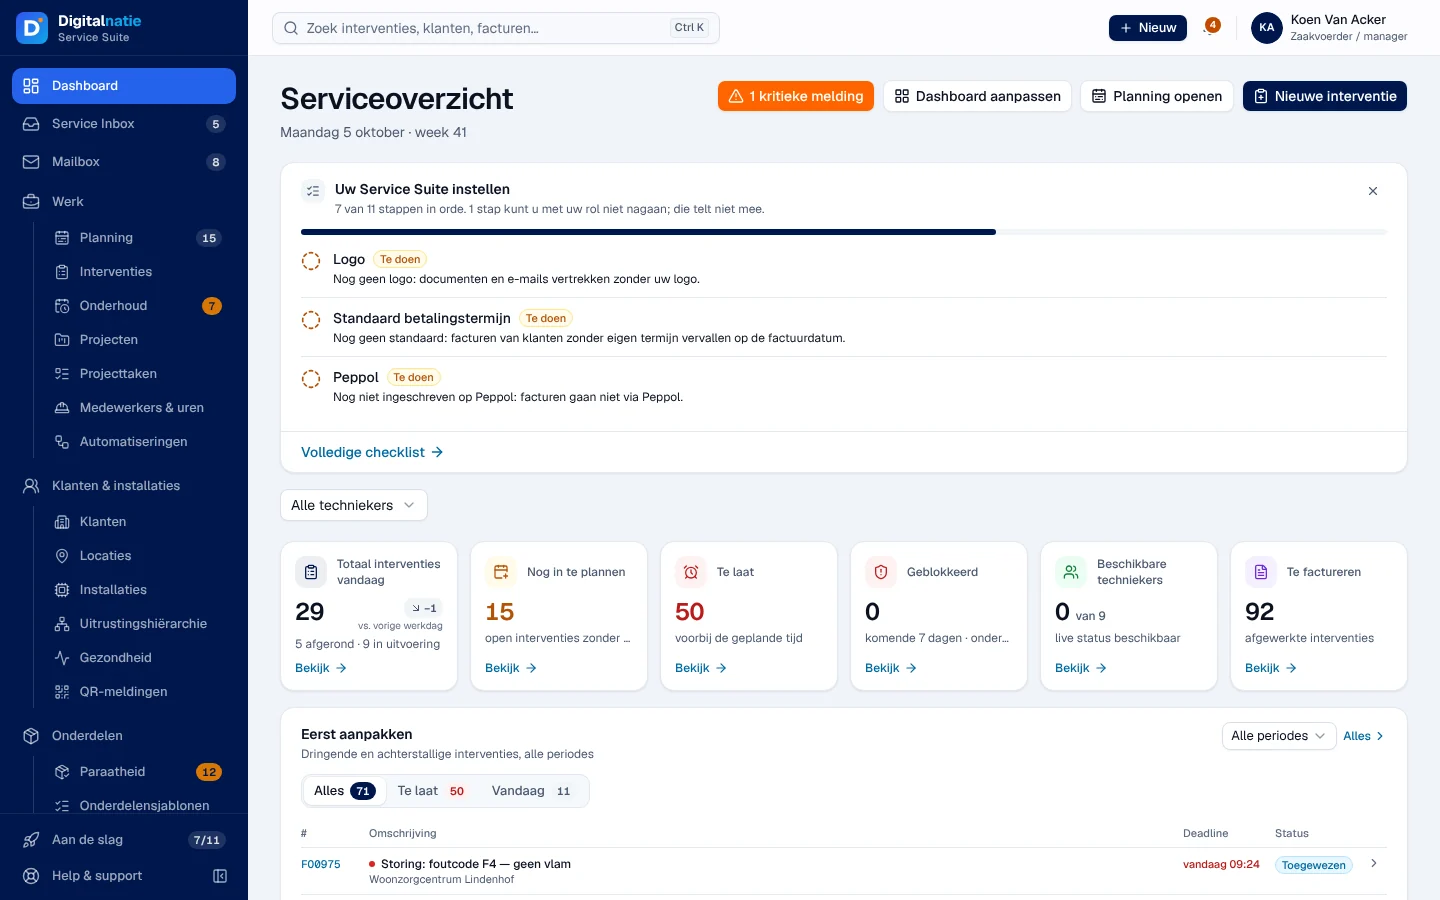
The left-hand menu
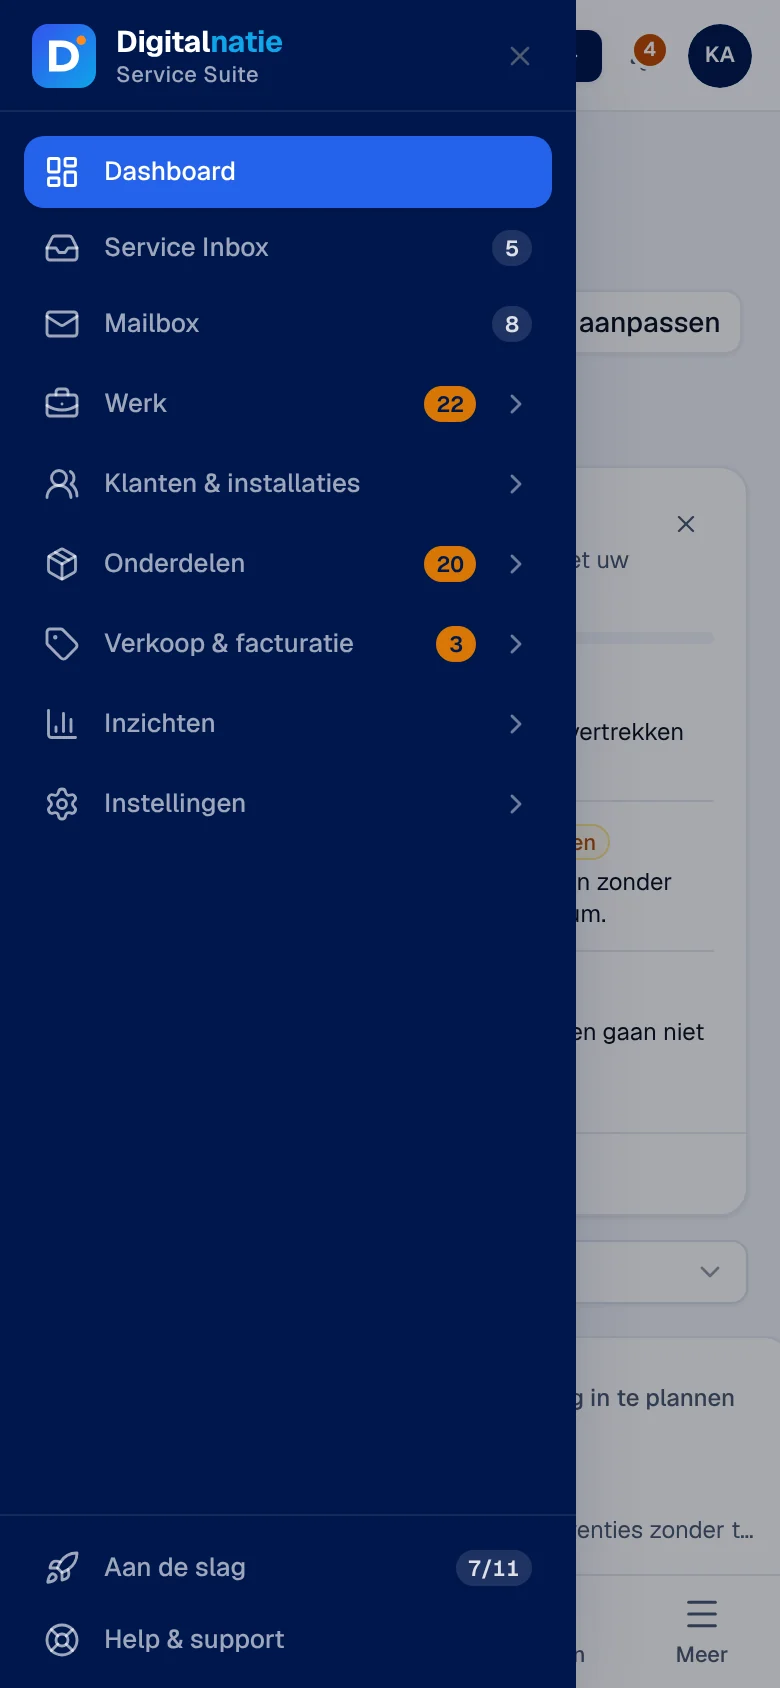
Section titled “The left-hand menu”The menu groups the screens by area: at the top Dashboard, Service Inbox and Mailbox, then Werk (work), Klanten & installaties (customers and installations), Onderdelen (parts), Verkoop & facturatie (sales and invoicing), Inzichten (insights) and Instellingen (settings). The general overview links each module to its guide.
- A screen you do not see is not a fault: your role does not give it to you, or it is not part of your plan. A group without any permitted screen disappears.
- The counters to the right of an entry show what is waiting (for example the interventions to schedule). An orange counter flags a point of attention (parts, maintenance, overdue invoices). Above 99, it shows “99+”.
- At the bottom: Aan de slag (getting started, with the number of steps completed) for administrators and managers as long as steps remain open — see Getting started — and Help & support, which opens your organisation’s support page in a new tab.
Collapse the menu
Section titled “Collapse the menu”The button at the bottom right of the menu, Zijbalk inklappen (collapse sidebar), keeps only the icons. Zijbalk uitklappen expands it again. This choice is remembered in this browser. On a tablet, the menu is always reduced to icons.
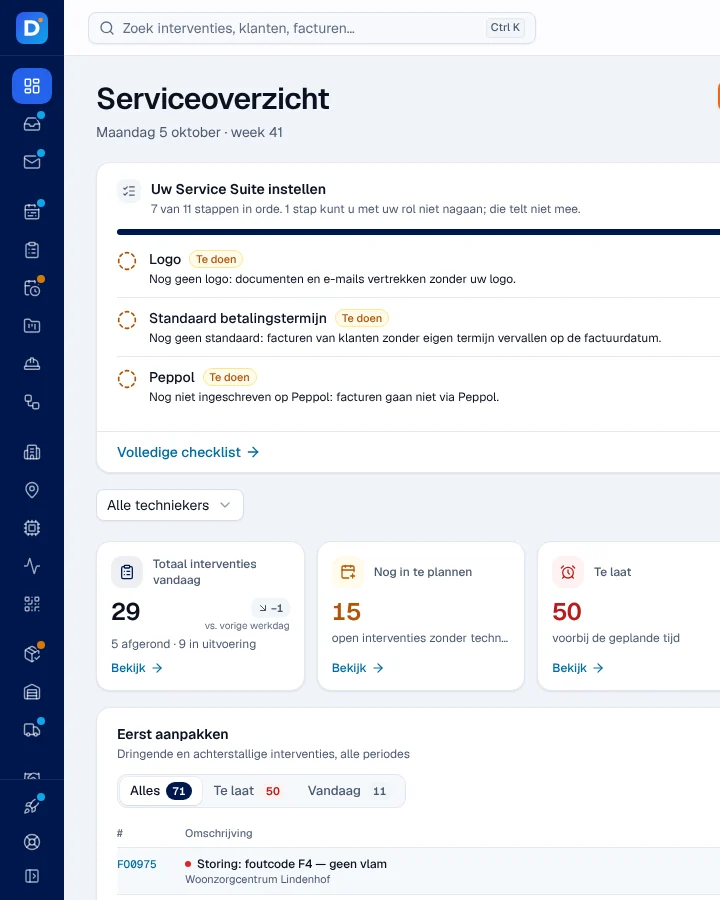
The top bar
Section titled “The top bar”| Element | What it is for |
|---|---|
| Zoek interventies, klanten, facturen… | opens quick search (see below) |
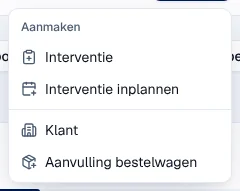
| Nieuw (new) | quickly creates an item; visible if you can create interventions |
| the Meldingen (notifications) bell | your messages and activities, with the number of unread items |
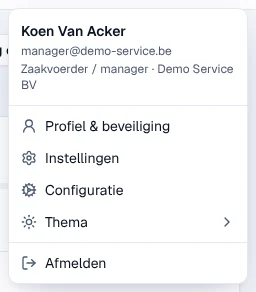
| your name | your account menu |
Depending on your permissions, the Nieuw menu offers: Interventie (intervention), Interventie inplannen (schedule an intervention), Klant (customer) and Aanvulling bestelwagen (van replenishment).
Your account menu shows your name, your e-mail, your role and your organisation, then Profiel & beveiliging (profile and security), Instellingen (settings), Configuratie (if your role manages at least one organisation setting), Thema (theme: Licht light, Donker dark, Systeem same as your device) and Afmelden (sign out).
Search with quick search
Section titled “Search with quick search”-
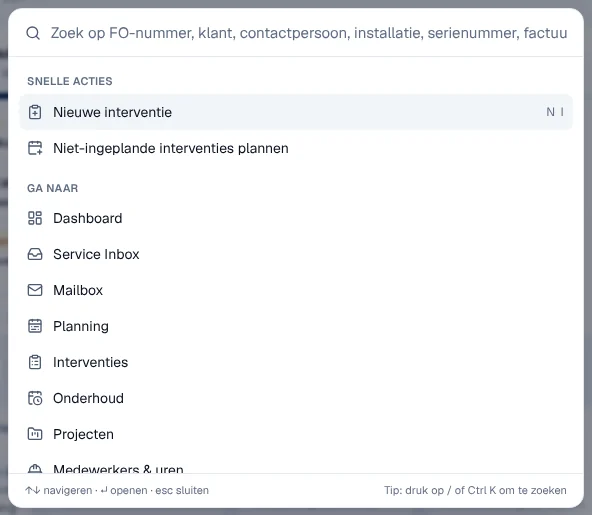
Click the search bar, or press Ctrl K (⌘ K on a Mac), or / when you are not in an input field.
-
Without typing anything, choose a quick action (Nieuwe interventie, shortcut N then I) or a screen under Ga naar (go to).
-
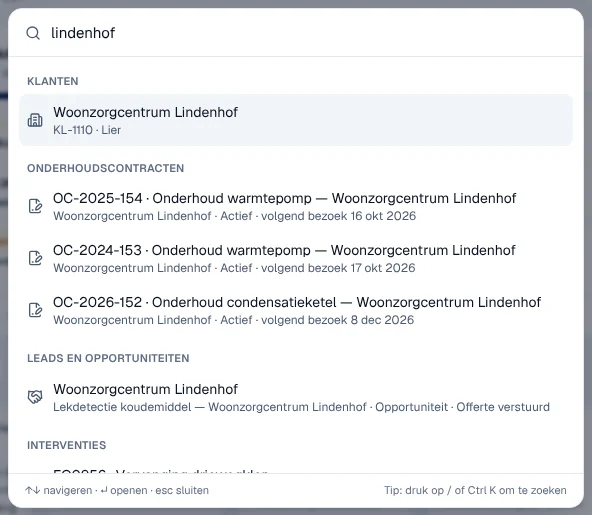
Type at least 2 characters: an intervention number (FO…), a customer, a contact, an installation, a serial number, an invoice… The results are grouped by type.
-
Choose a result with the arrow keys and Enter, or click it. Esc closes the search.
The search also finds screens and settings: type “wachtwoord” to go to your profile, or “werkuren” (working hours) for the matching configuration setting. It only shows what your role can open. Alle resultaten in … tonen opens the full list of a type.
Working in a list
Section titled “Working in a list”Lists (customers, interventions, invoices…) share the same tools.
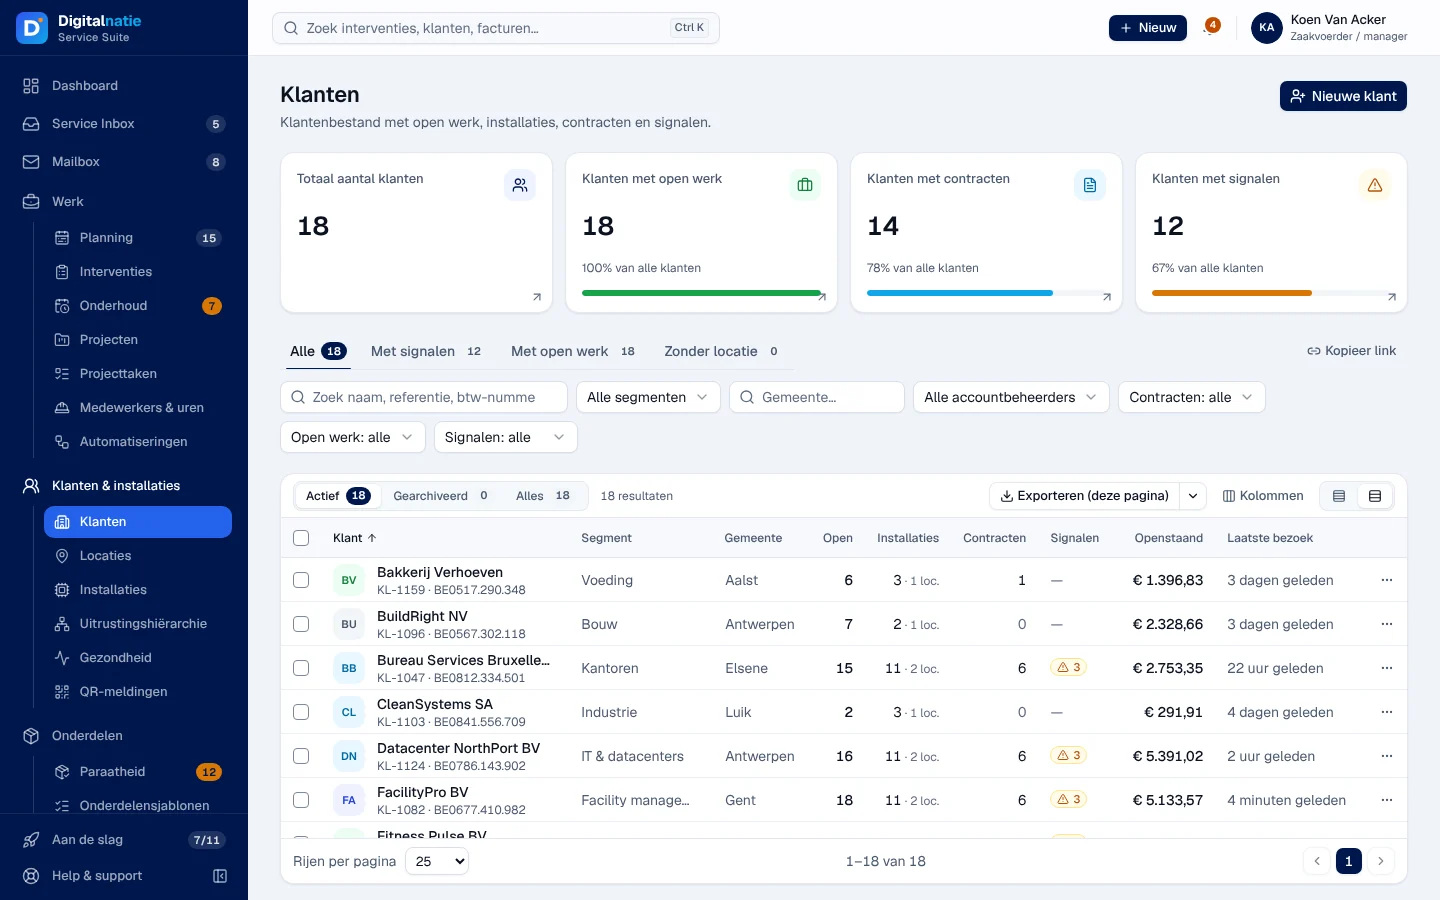
- The tabs above the filters are ready-made views, with their count (for example Alle, Met signalen). Kopieer link (copy link) copies the address of the list with its filters, so you can send it to a colleague.
- Filters and search narrow down the list; they are included in the page address.
- Actief / Gearchiveerd / Alles (active, archived, all): archived items can still be viewed.
- Exporteren (deze pagina) (export this page) creates a CSV file of the rows shown, with the visible columns. The arrow next to it offers Selectie (the ticked rows) and Alle resultaten (all results). Above 10,000 rows, the application asks for confirmation; above 50,000, it refuses.
- Kolommen (columns) chooses the columns shown; the two icons next to it set the row density. Rijen per pagina (rows per page) and the arrows at the bottom change the page.
Notifications
Section titled “Notifications”Click the Meldingen bell. The panel shows your messages and the activities assigned to you, the most recent at the top.
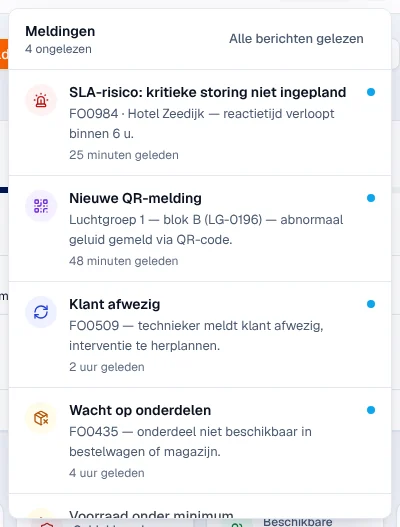
- Clicking a notification opens the item concerned and marks the message as read.
- Alle berichten gelezen (all messages read) marks the messages as read. The activities stay in the list until they are done.
- The list refreshes every minute. If there is an error: “De meldingen konden niet worden bijgewerkt.” and Opnieuw proberen (try again).
On a phone
Section titled “On a phone”On a phone, the left-hand menu is replaced by a tab bar at the bottom: Overzicht (overview), Planning, Interventies, Klanten, then one or two tabs depending on your job (for example Magazijn and Busvoorraad for the warehouse, Facturen and Rapporten for accounting) and Meer (more). Meer, or the Menu openen icon at the top left, opens the full menu; only one group is open at a time.
Current limits
Section titled “Current limits”- There is no guided tour in the application. Help is provided through this guide and the Help & support link.
- The choice of theme, density and collapsed menu is remembered per browser, not per account.
See also
Section titled “See also”- The dashboard
- Getting started: Aan de slag
- Settings (Instellingen) — profile, theme, security
- Users, roles and permissions — why you do not see a screen