

Set up your environment
Setting up your environment is the guided start of your Service Suite. The screen answers one question: is this environment ready to work with?
It shows what is already configured, what is still missing, what is optional and where to change it. It creates nothing and changes no setting itself — every button takes you to the screen in Service Suite where you make the change.
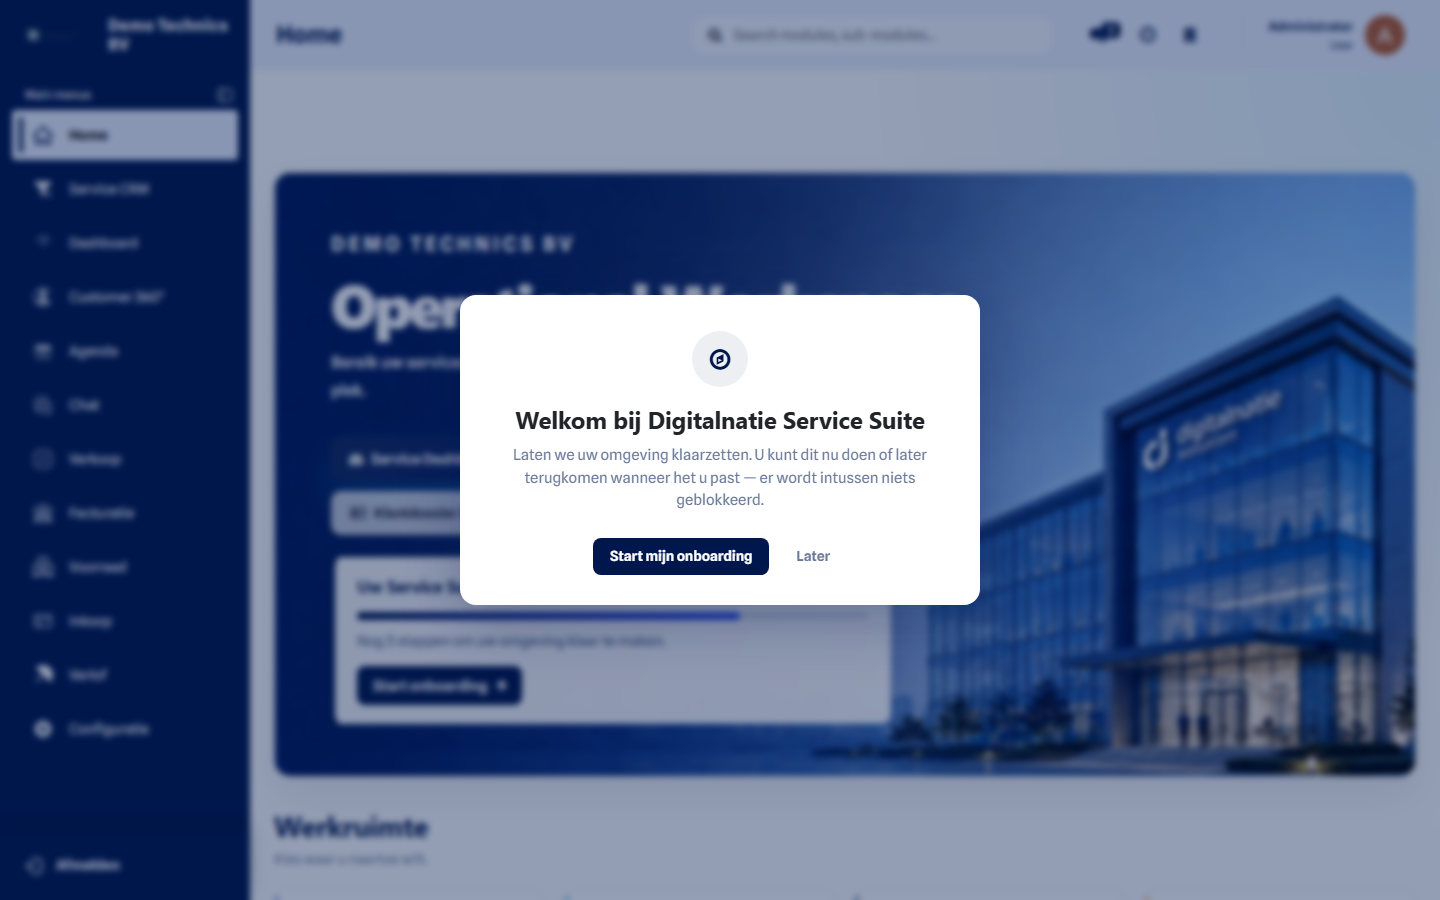 The first time you sign in. Start now or come back later — nothing is locked while you wait.
Progress is measured, not remembered
Section titled “Progress is measured, not remembered”This is the most important thing to know, because it differs from most setup wizards.
Your percentage does not come from clicking “Next”. It is recalculated every time you open the screen, from your real data: your actual company details, your actual users and the roles they hold, your actual technicians, products, customers and sites.
Two consequences you will notice:
- You cannot tick a step off without doing the work. Clicking through every step moves the figure by zero.
- If something is removed later, the percentage falls again. Delete your logo or deactivate your last technician and that step is open again tomorrow. That is not a fault: the screen tells you the truth about your environment today.
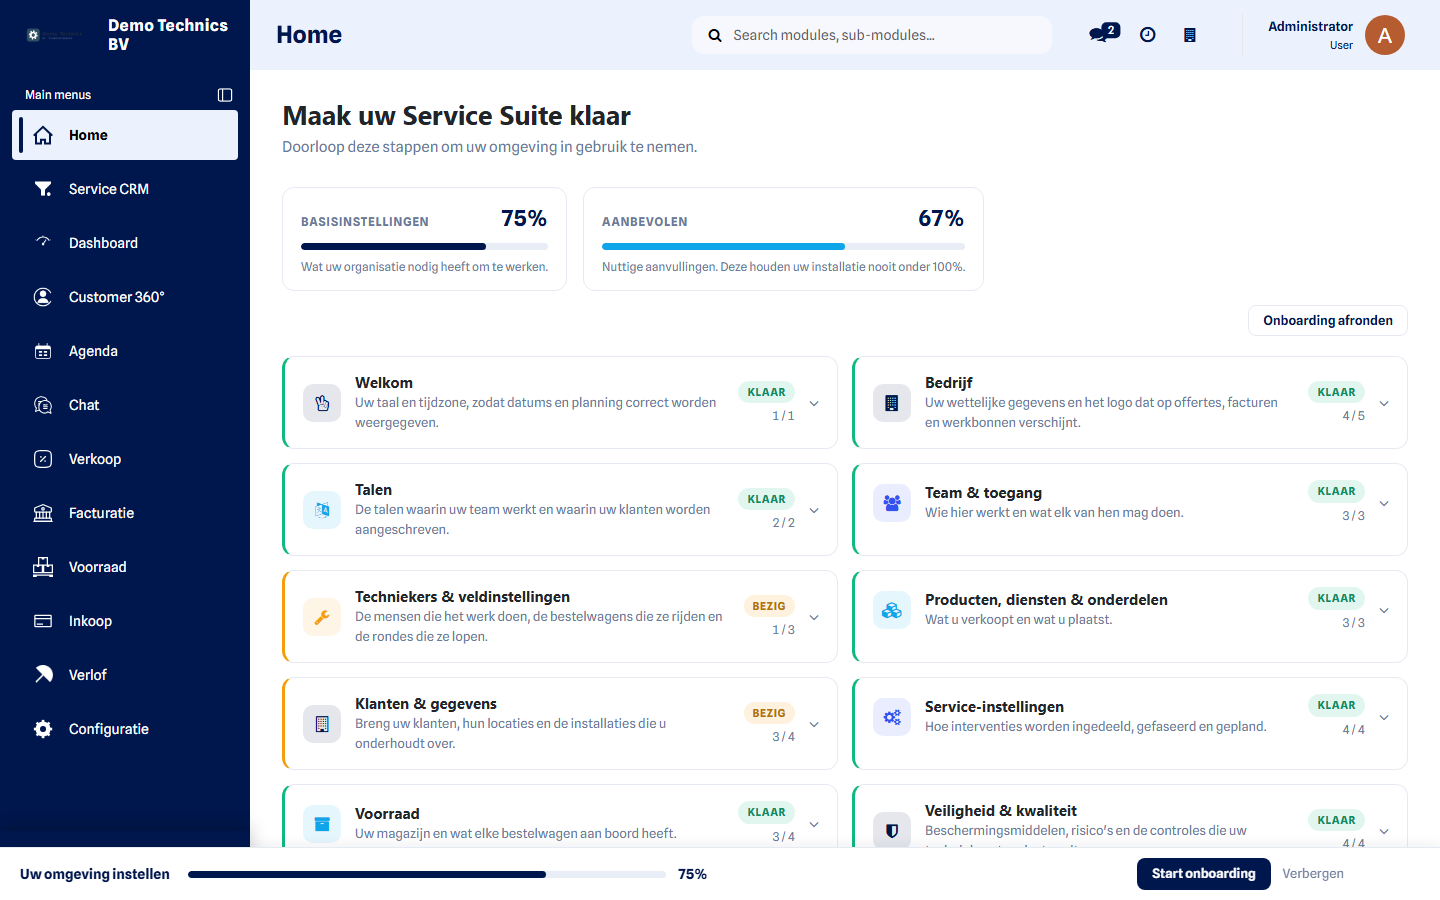 Two percentages, and below them every step with its own state.
Core and Recommended
Section titled “Core and Recommended”There are two percentages, and they do different jobs.
| What it means | |
|---|---|
| Core setup | What your organisation needs in order to operate. This is the one that must reach 100%. |
| Recommended | Useful additions that depend on how you work. These never hold you below 100%. |
Who sees this
Section titled “Who sees this”Onboarding is for the company administrator. That person sets the environment up and is the only one who works through the steps.
Your technicians, your customers in the portal and colleagues without an administrator role do not see the bar and cannot open the screen. The internal Digitalnatie administrator does not see it either — this is your environment, not ours.
The steps
Section titled “The steps”-
Welcome — your language and timezone. An unset timezone silently shifts your planning and timesheets, so it comes first.
-
Company — your legal details, address, VAT or registration number, contact details, and the logo that appears on your quotations, invoices and service reports. This is your business identity; the look of the software itself stays Digitalnatie.
-
Languages — the languages your team works in and your customers are written to in.
-
Team & access — invite your colleagues and give each of them a role. Roles decide what somebody may see and do; nobody should be left without one.
-
Technicians & field setup — the people who do the work, their van and their rounds. A technician only counts once a real login is linked: without one, nobody can be dispatched or sign anything off.
-
Products, services & parts — what you sell and what you fit. Add them by hand or import a file; both count the same.
-
Customers & data — bring your existing customers, sites and equipment across with Data import. The screen shows the ten datasets in the order they have to be loaded, and warns when something a later dataset depends on is still missing.
-
Service settings — order types, stages, teams, categories and templates.
-
Inventory — your warehouse and what each van carries. If you work without stock management, mark this step as not applicable.
-
Safety & quality — PPE, LMRA, risks and checklists. This step only ever gets stricter, never looser: as soon as you activate a PPE or risk rule yourself, there must be a catalogue behind it that can satisfy it.
-
Documents & maintenance — reusable templates, maintenance contracts and frequencies.
-
E-mail — optional. See below.
-
Integrations — calendars, navigation and messaging, where you use them.
-
Advanced — API, webhooks and single sign-on.
-
Go-live check — the final check, with one complete test intervention.
-
Ready — your Service Suite is in service.
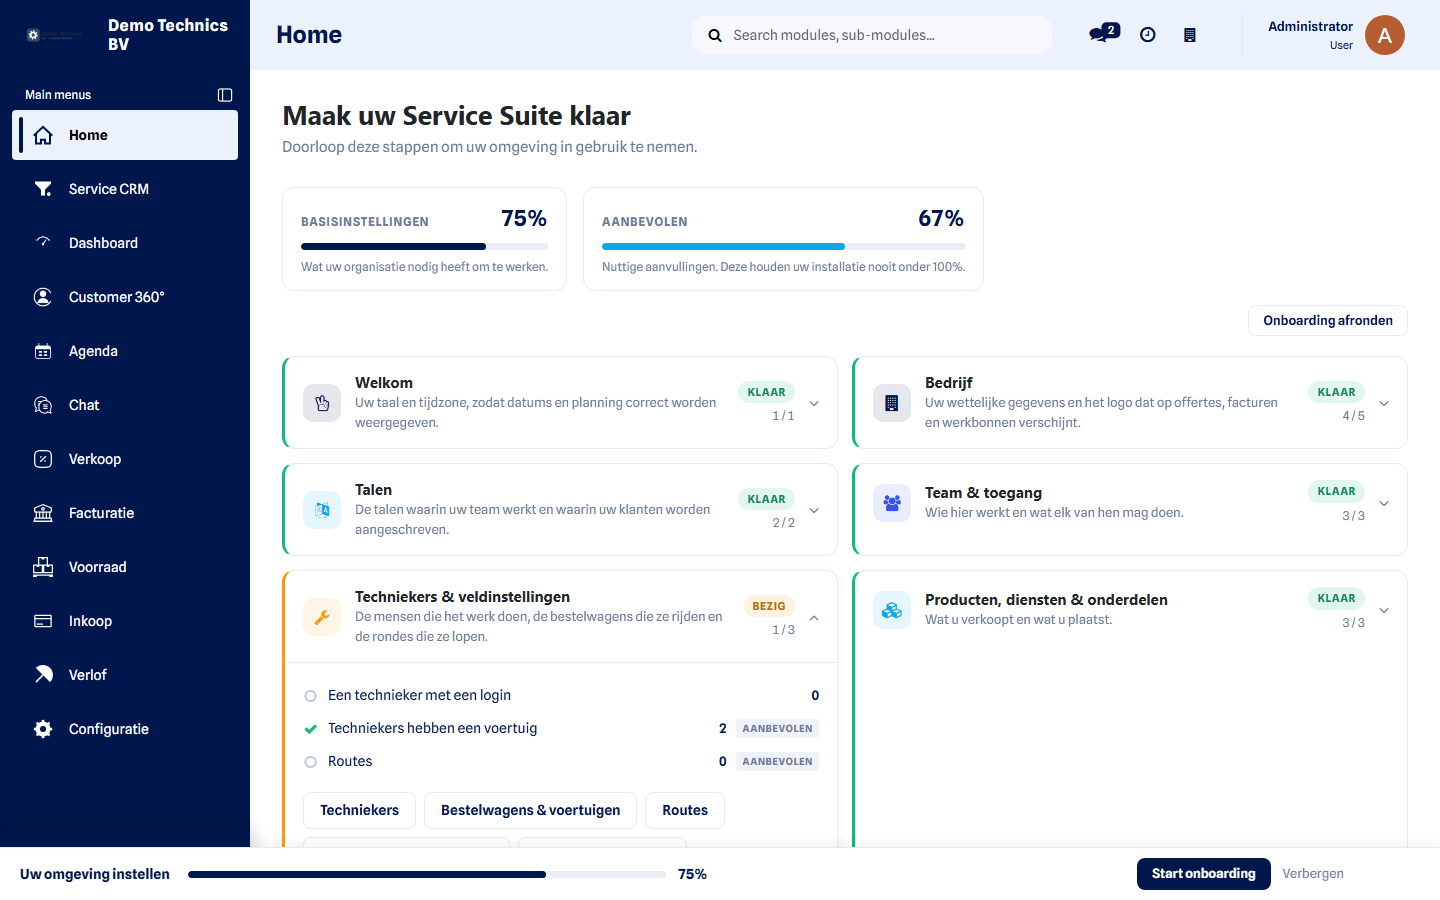 Expand a step to see exactly which checks sit behind it — and where to set them.
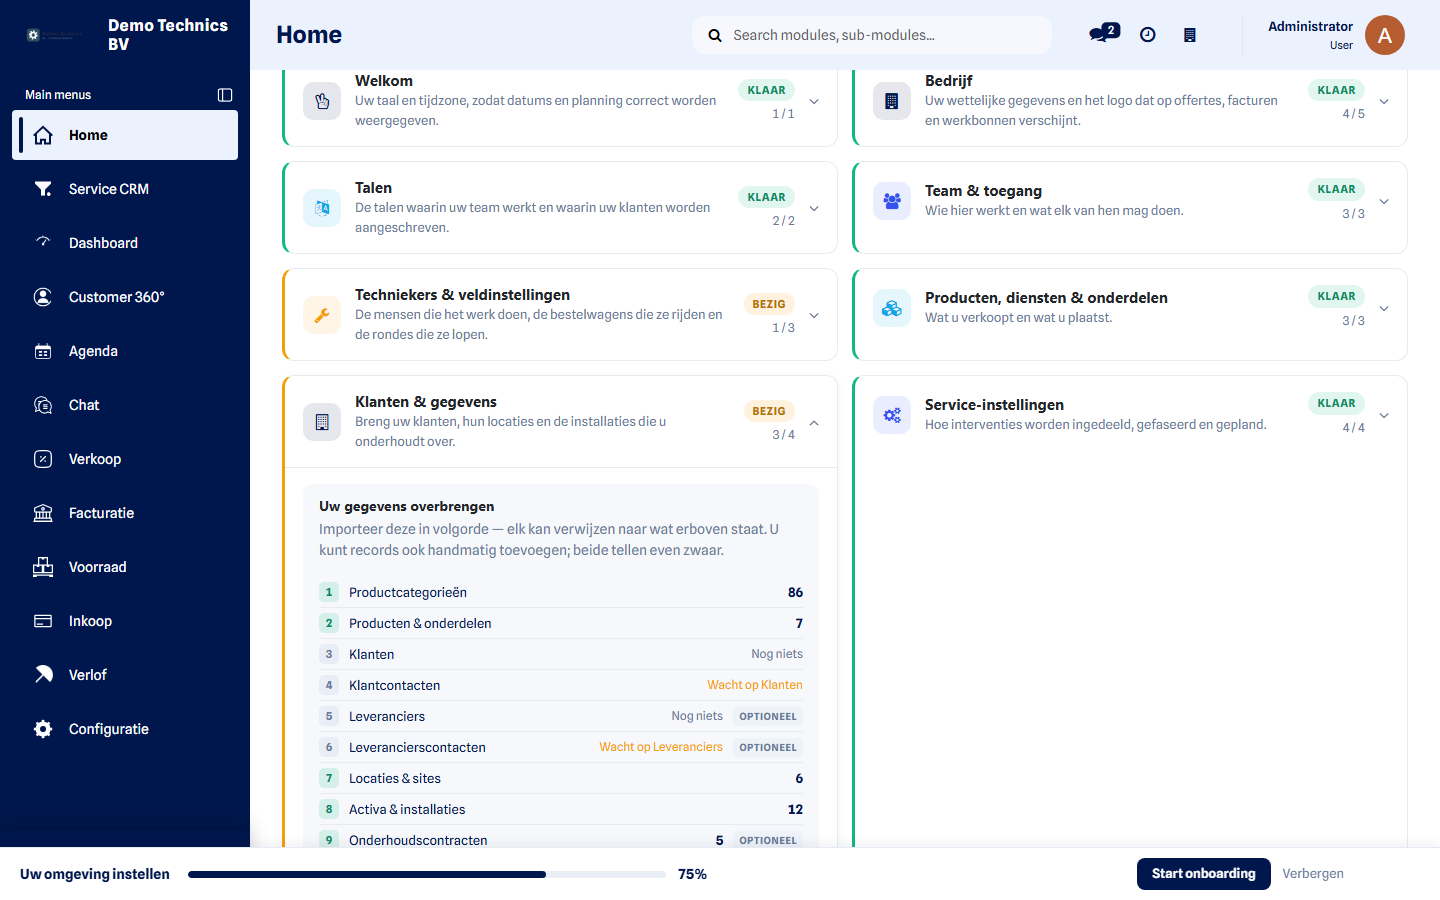 The Customers & data step shows the order to bring your data across, and flags anything still waiting on something else.
E-mail is optional
Section titled “E-mail is optional”Step 12 asks one question: do you want to send e-mail from your own domain?
Either answer completes the step. Only the question itself is required.
- Yes — you set your sender and outgoing server and send a real test message. If it arrives, the step is satisfied. Change your server or sender afterwards and the stored result expires by itself and the screen asks you to test again — a passing test should not keep counting for a configuration that has since changed.
- No — the step leaves the calculation and does not hold you back.
The go-live check
Section titled “The go-live check”Once every Core step is green, the last step asks you to run one complete intervention: a customer, a site, an asset, a service order, scheduling, a technician, execution, a report and a customer signature.
The screen draws that chain and shows how far you got. It creates no record itself. You do this with a real job, your own way — that is the only way it proves your workflow works rather than merely that the settings are right. Only once that intervention is finished and signed can you confirm go-live.
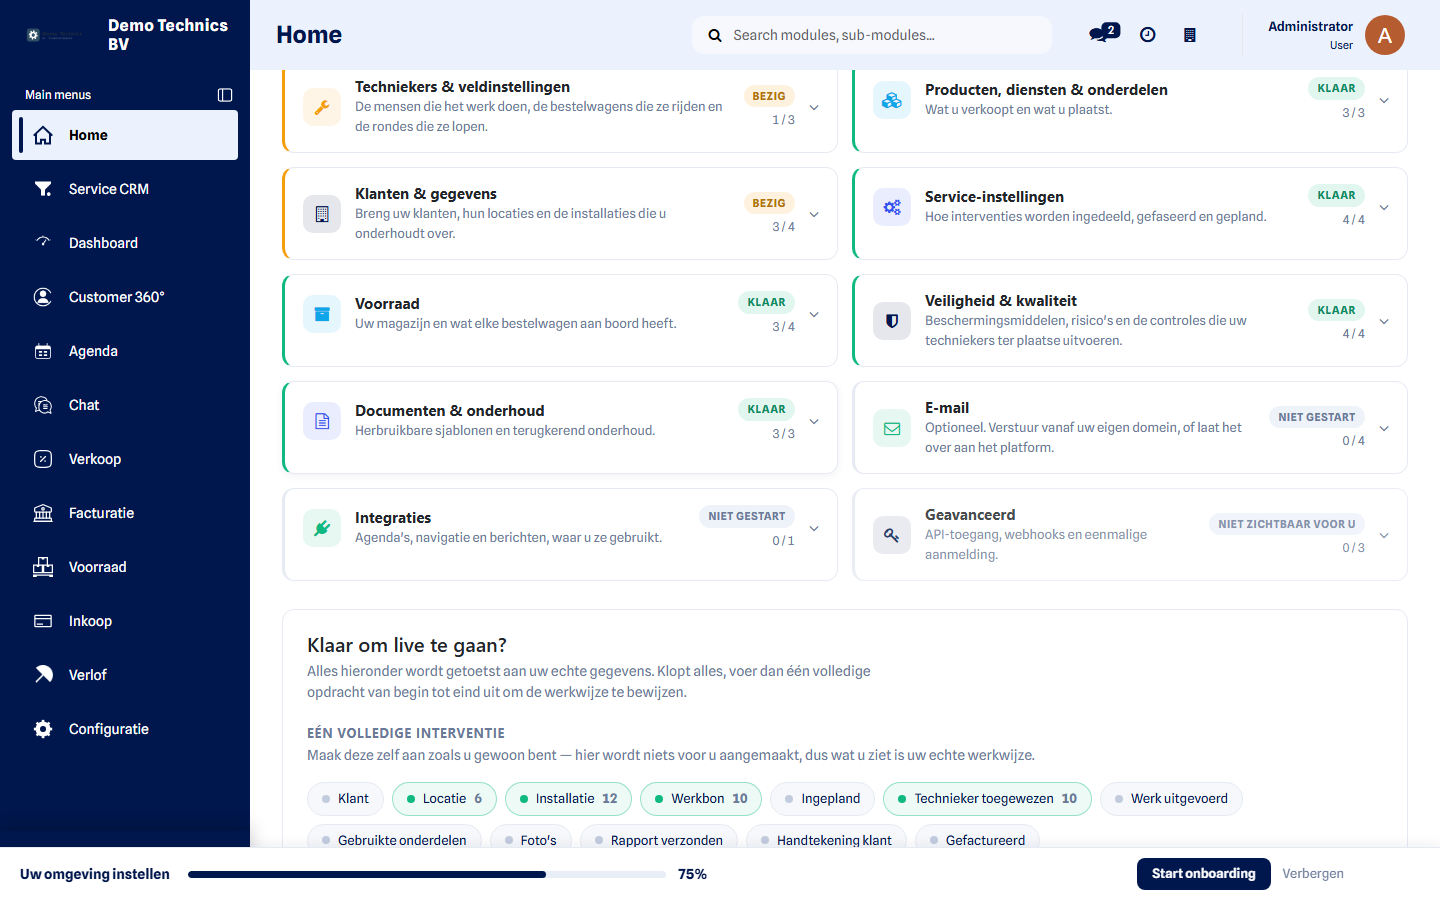 The chain of one complete intervention. The screen creates nothing itself — you run it with a real job.
Finishing onboarding
Section titled “Finishing onboarding”When you consider your environment set up, click Finish onboarding.
That is a decision, not a score. You can finish at any percentage — including below 100%. It means:
I have configured what I need for now and I no longer want guidance.
It does not mean every feature is configured. If you do not use stock management, or you would rather send from the platform than from your own domain, finishing is exactly the right thing to do.
Before you confirm, the screen shows your current percentage and what is still open, so you decide knowingly rather than dismissing a dialog.
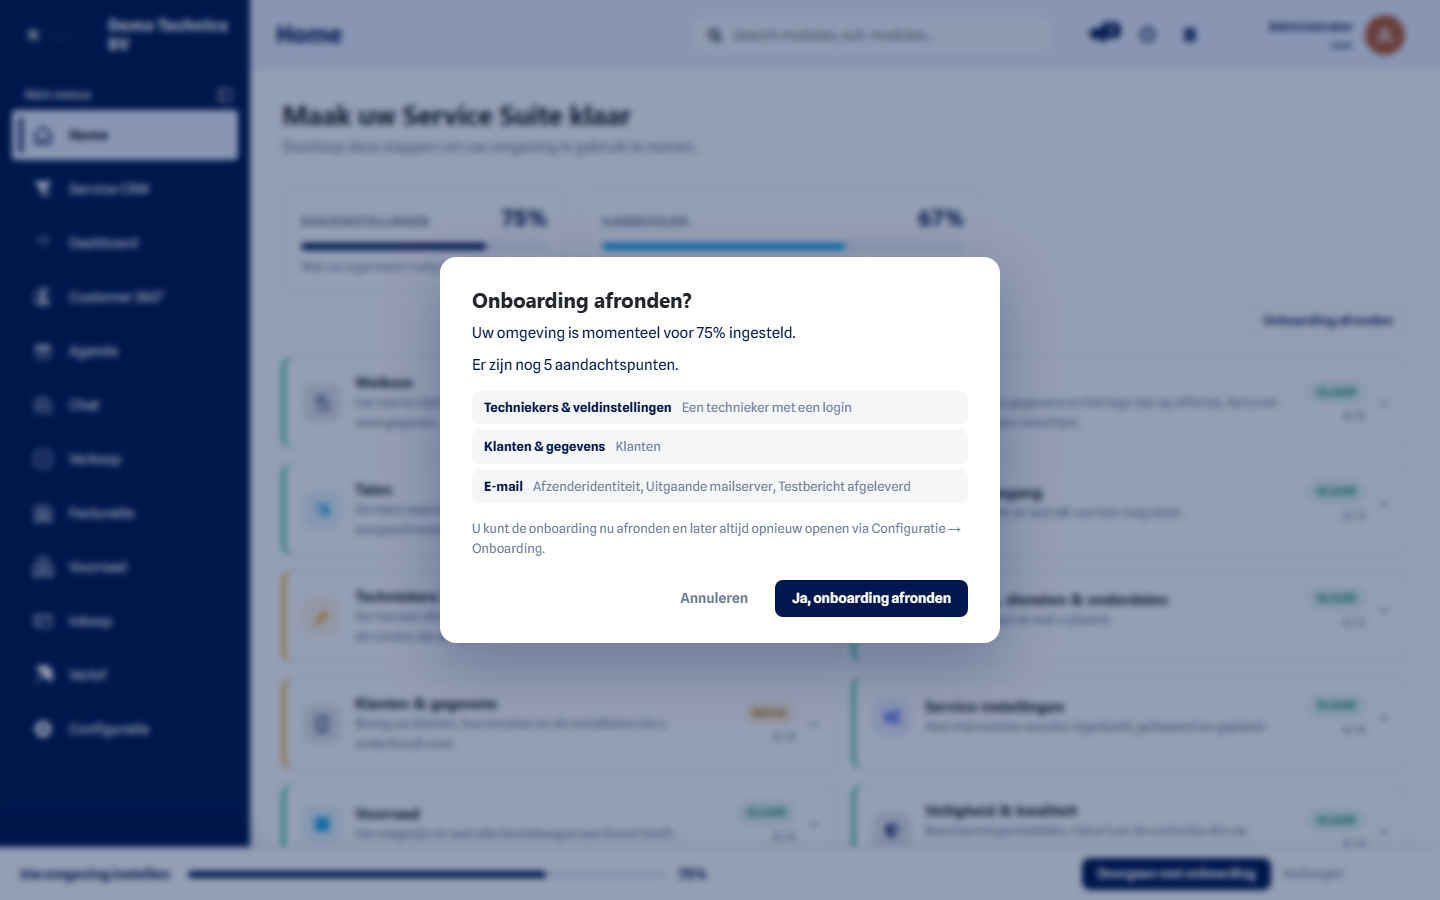 Before you confirm, you see your current percentage and what is still open.
Once finished:
- the welcome message no longer appears;
- the progress bar at the bottom goes away;
- the onboarding block on Home goes away;
- Configuration → Onboarding stays permanently reachable;
- your live readiness stays visible there, with the date and who finished it;
- what is still open stays listed — finishing hides nothing.
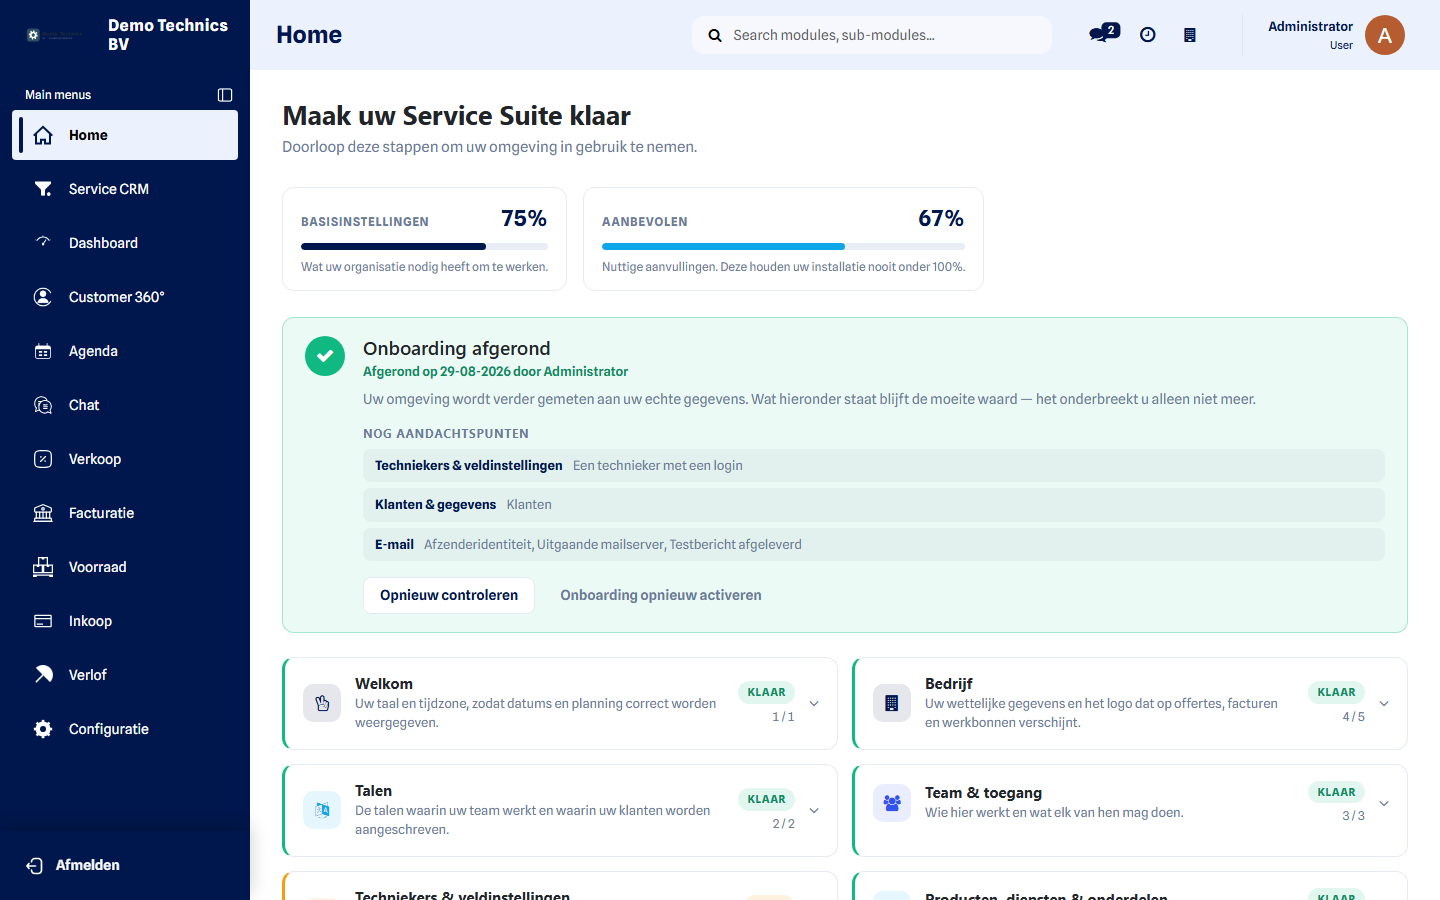 After finishing, everything stays visible: where you stand, the date, and what still needs attention. Nothing turned green that was not.
If your configuration changes later, a step can show Action needed again. Check again recalculates where you stand.
The bar, and coming back later
Section titled “The bar, and coming back later”While Core setup is incomplete, a slim bar sits at the bottom of the screen with your progress and a button to continue.
You can hide it. That is not the same as finishing: your percentage stays what it is and the outstanding steps stay outstanding. As soon as Core reaches 100%, the bar disappears on its own.
Onboarding stays reachable at any time from Configuration → Onboarding, also after you are done — useful when you want to add something later, or when a step needs attention again.
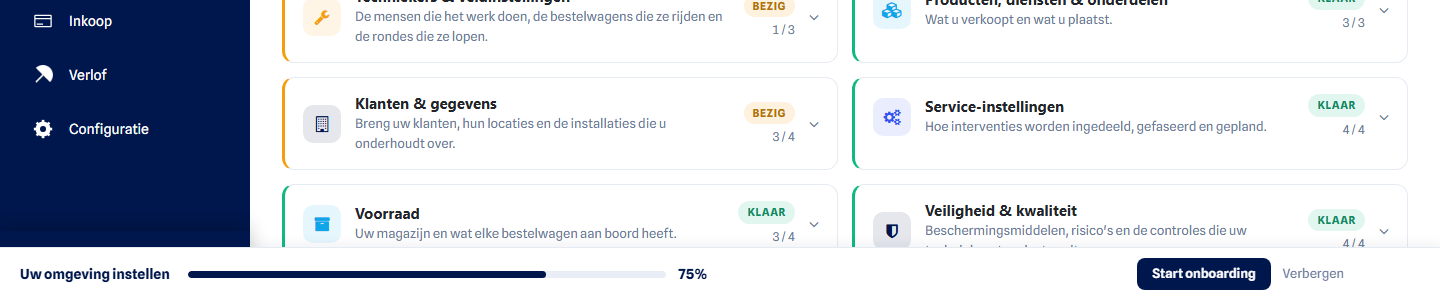 The bar stays at the bottom while Core setup is incomplete.
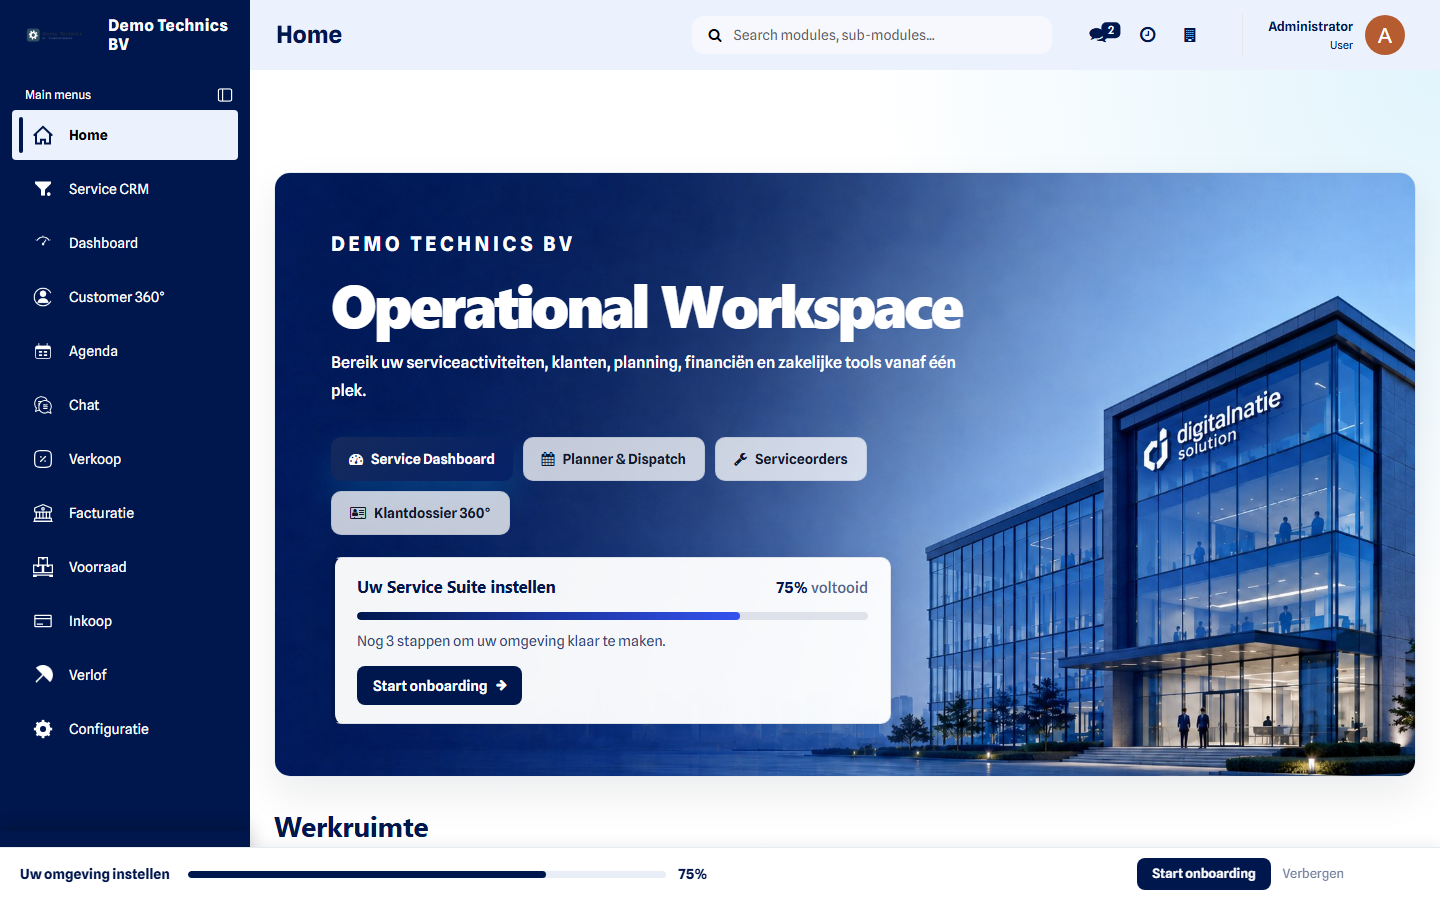 The same figure on your home page — there is only ever one calculation.
Need help?
Section titled “Need help?”Every step carries a Need help? link in its bottom corner, pointing at the page in this guide that covers that subject.